Application Examples
Fast stacking and further processing in AstroWizard
Settings:
- background_extraction = none
- denoise = none
- deconvolution = none
- star_removal = Starnet++
- crop_percentage = 0.00
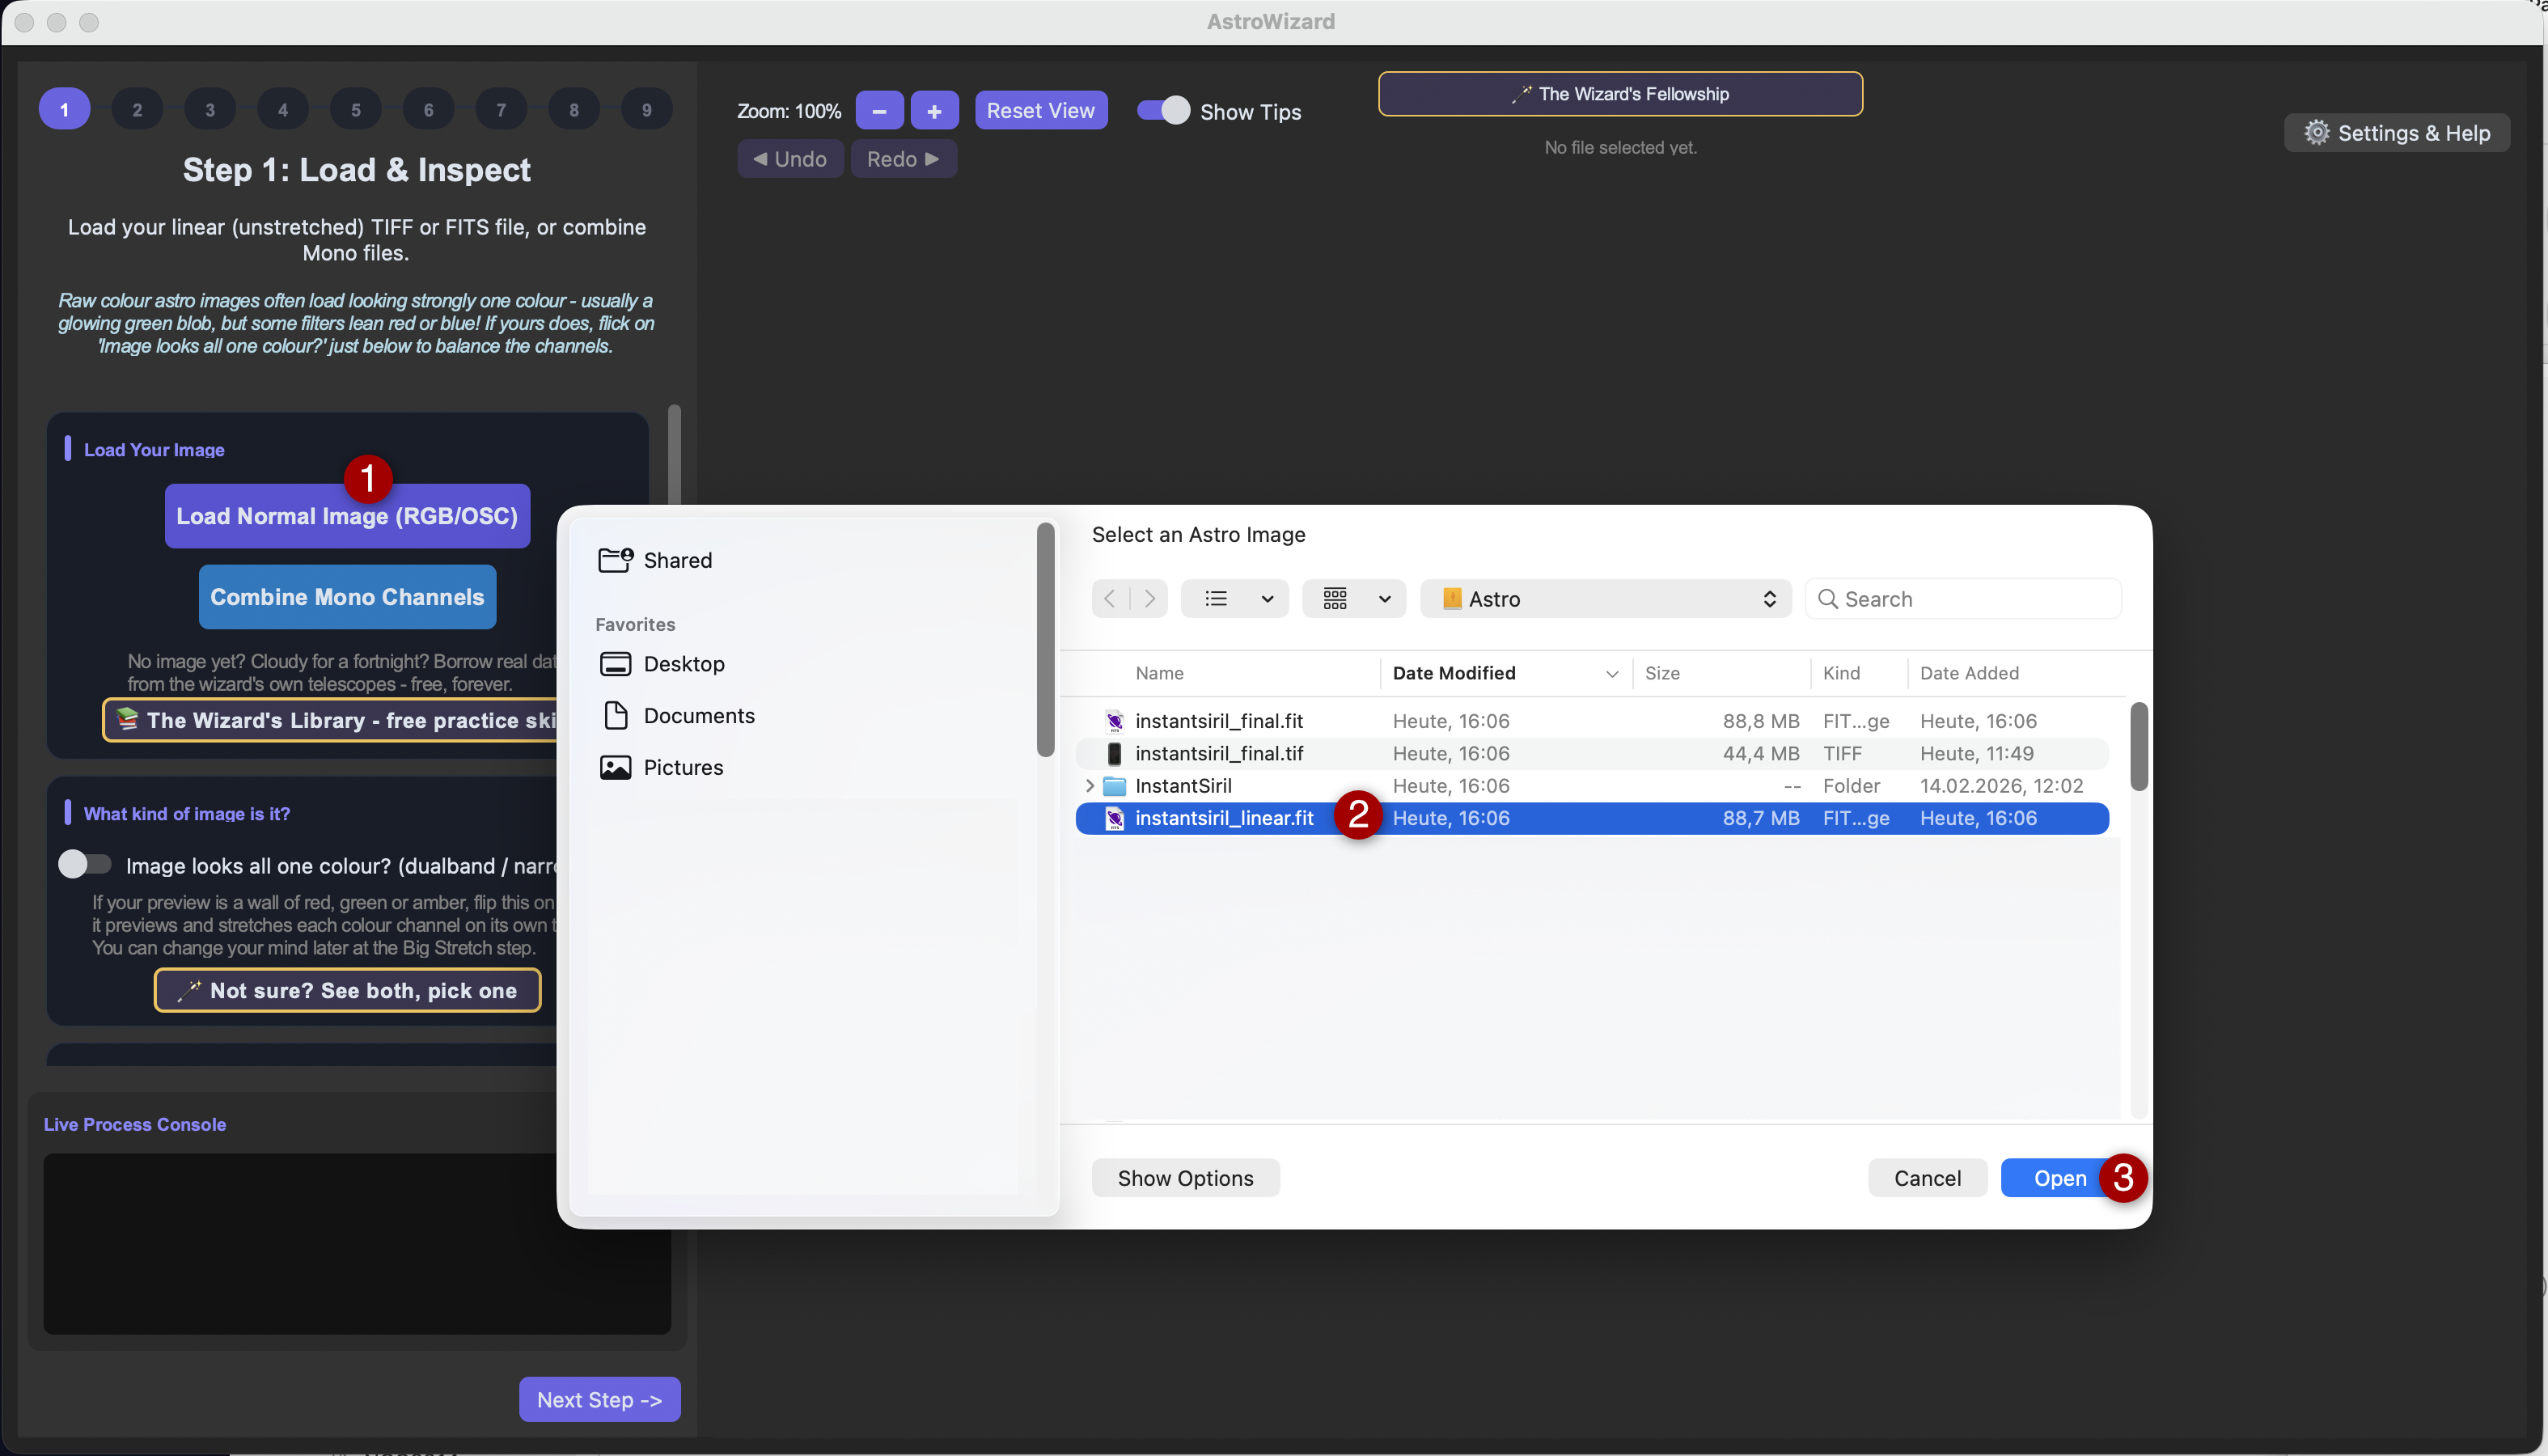
Fast, fully automatic result without paid tools (in this example using IR-Cut data)
Settings:
- film_emulation = Velvia
- background_extraction = Graxpert
- denoise = Graxpert
- deconvolution = Graxpert
- star_removal = Starnet++
- stretch = SetiAstro
- crop_percentage = 0.05
- star_brightness = 0.25
- saturation = 0.30
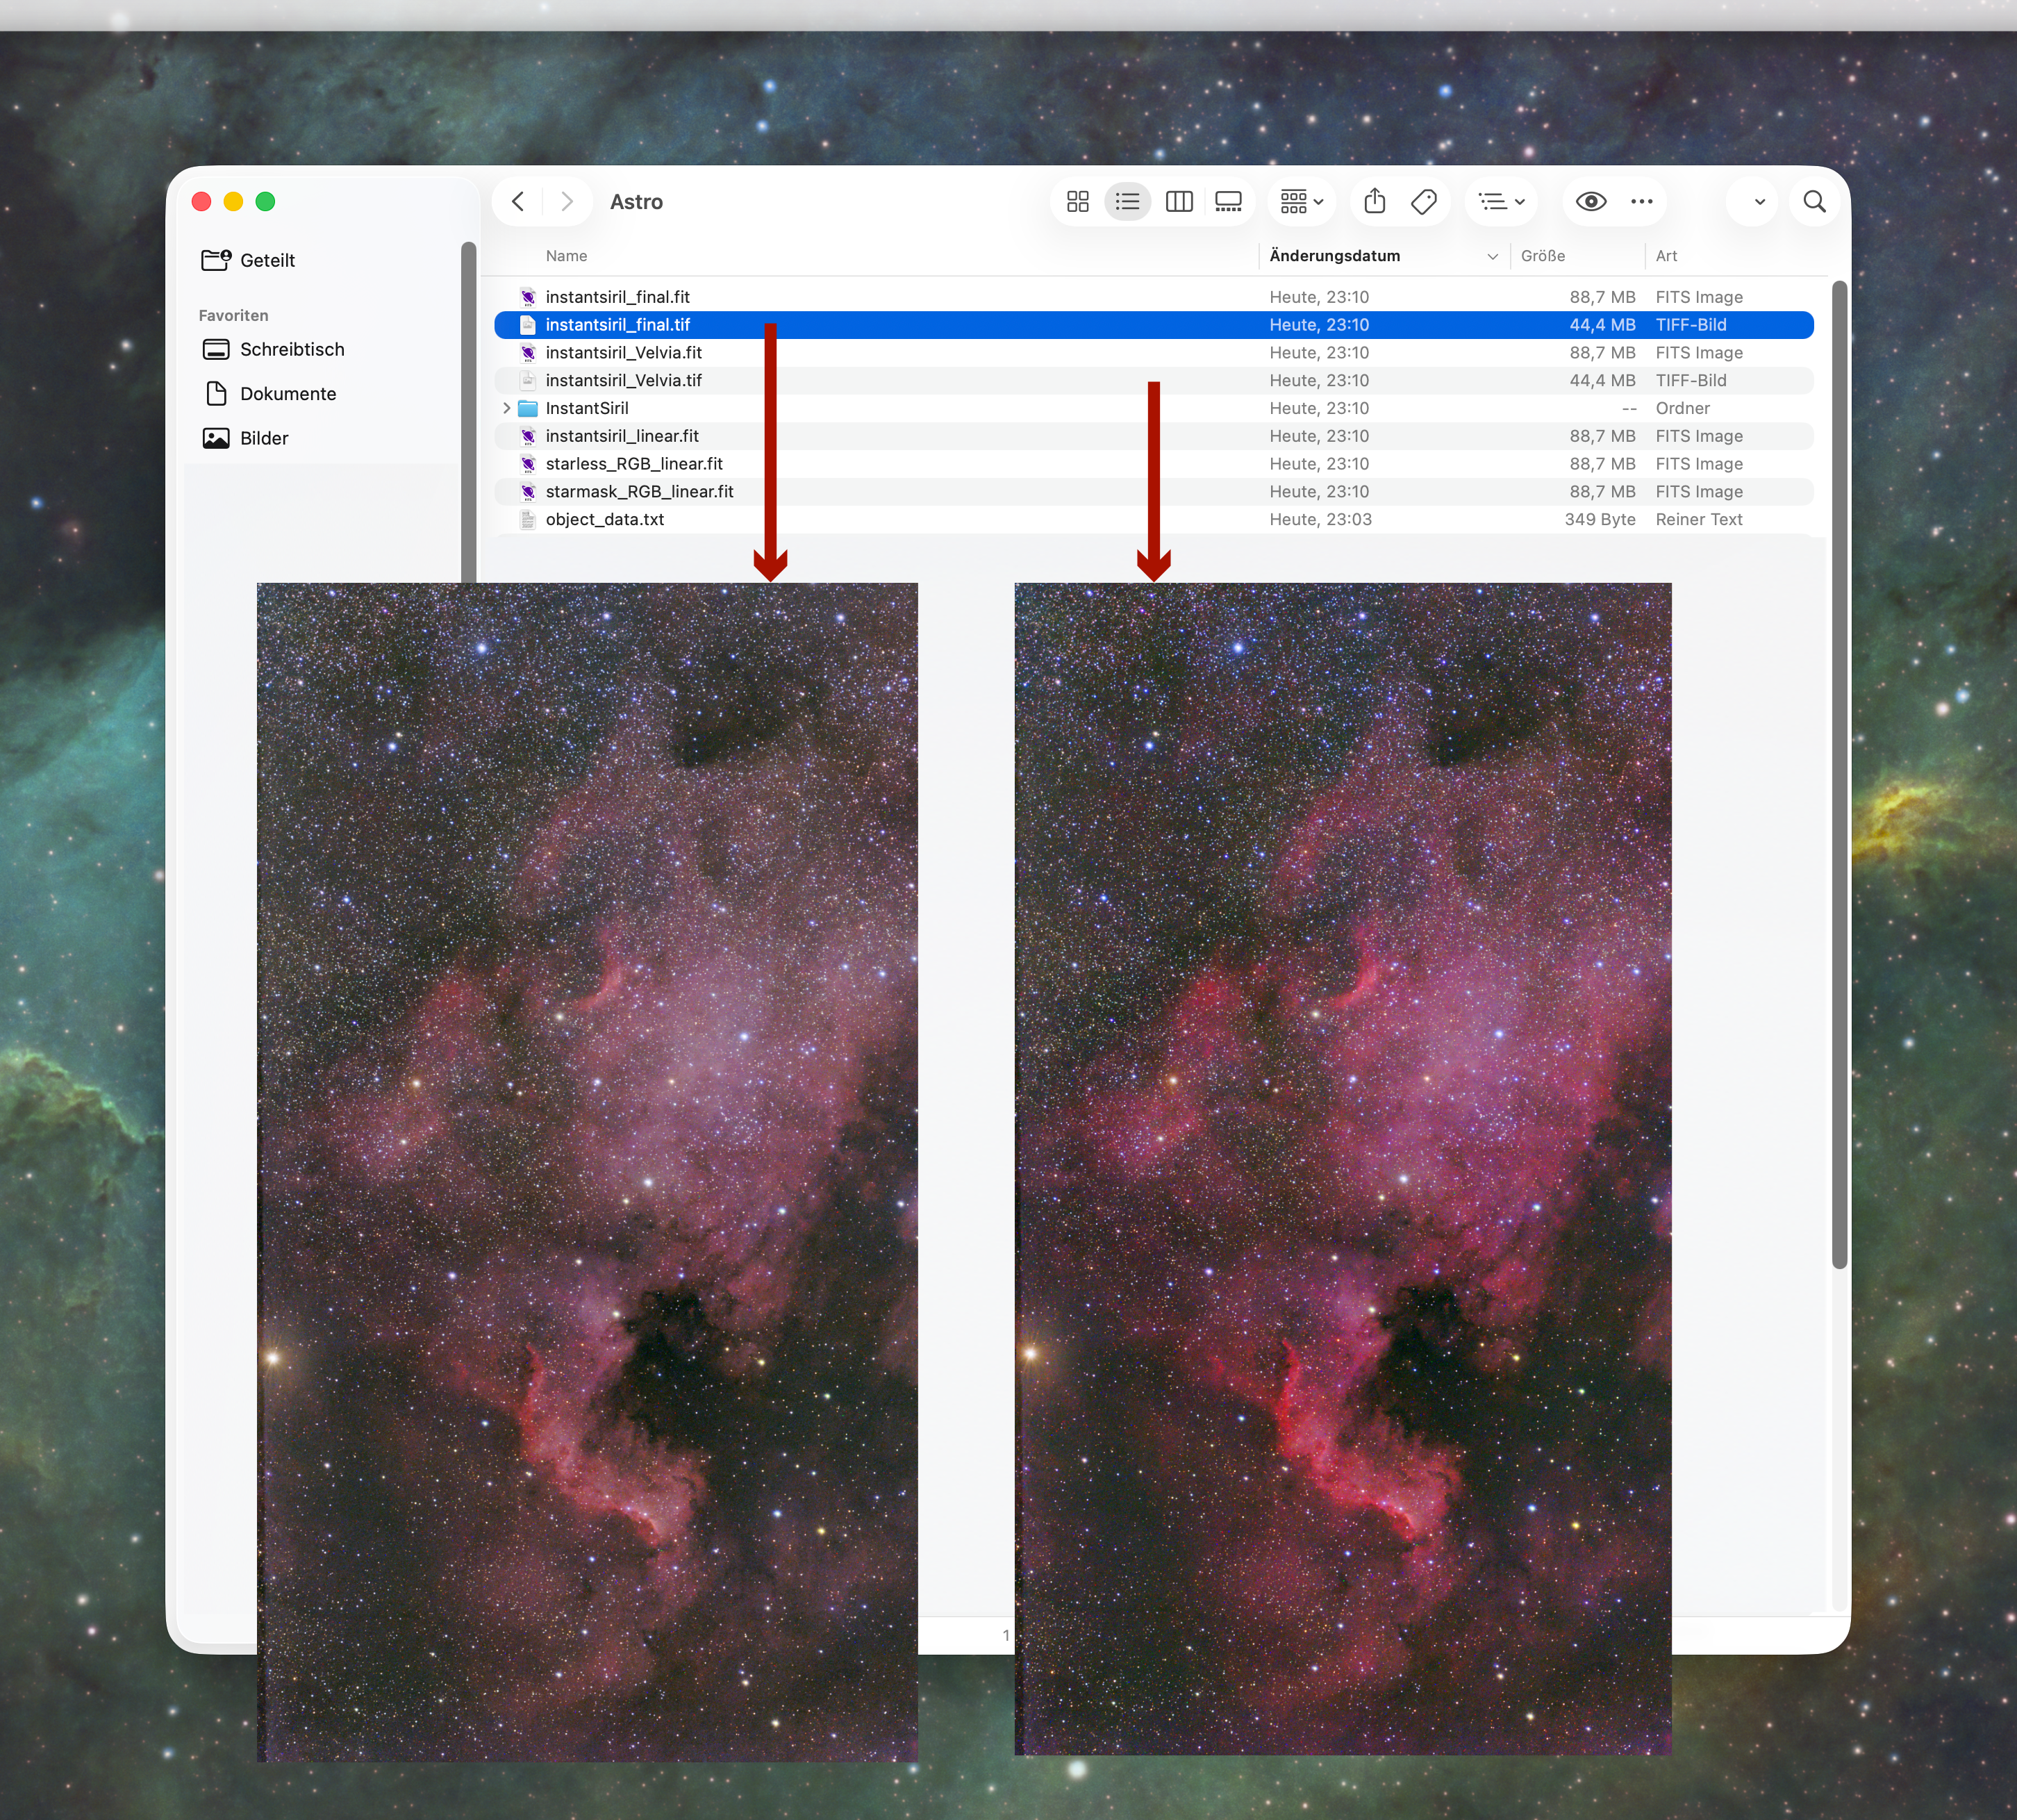
Editing without paid tools, custom stretching (in this example using IR-Cut data)
Settings:
- background_extraction = Graxpert
- denoise = Graxpert
- deconvolution = Graxpert
- star_removal = Starnet++
- veralux_stretch = true
- crop_percentage = 0.05
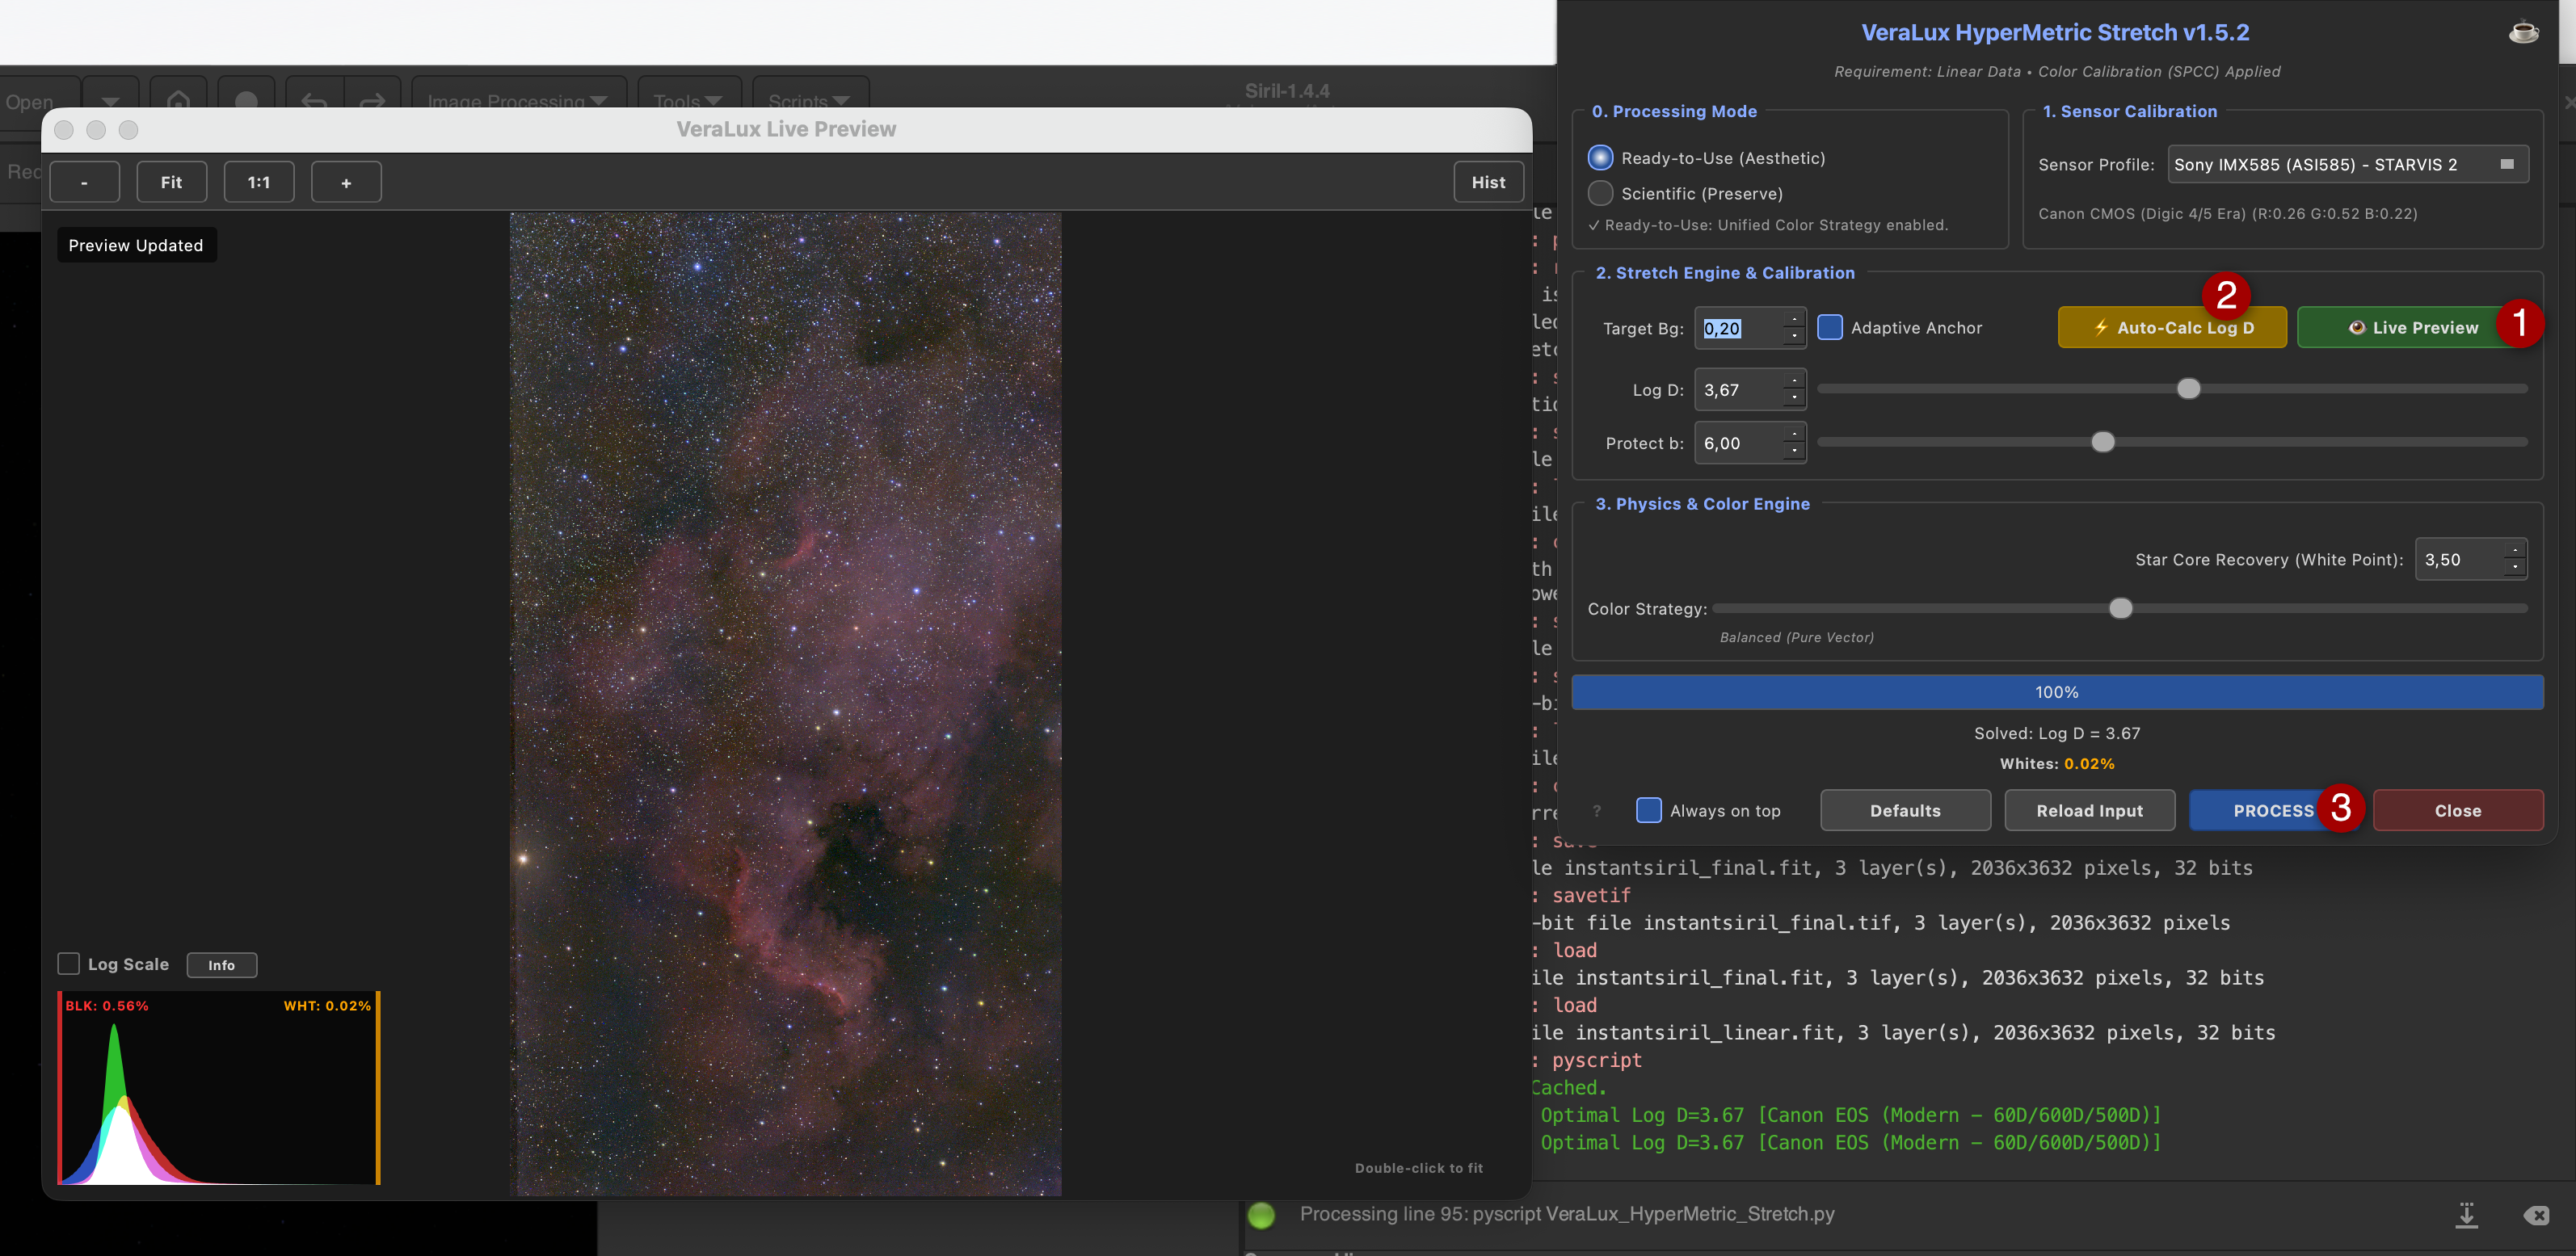
Custom stretching, custom star optimization, further processing in Affinity Photo (in this example using IR-Cut data)
Settings:
- background_extraction = Graxpert
- denoise = Graxpert
- deconvolution = Graxpert
- star_removal = Starnet++
- veralux_stretch = true
- veralux_starless = true
- crop_percentage = 0.05
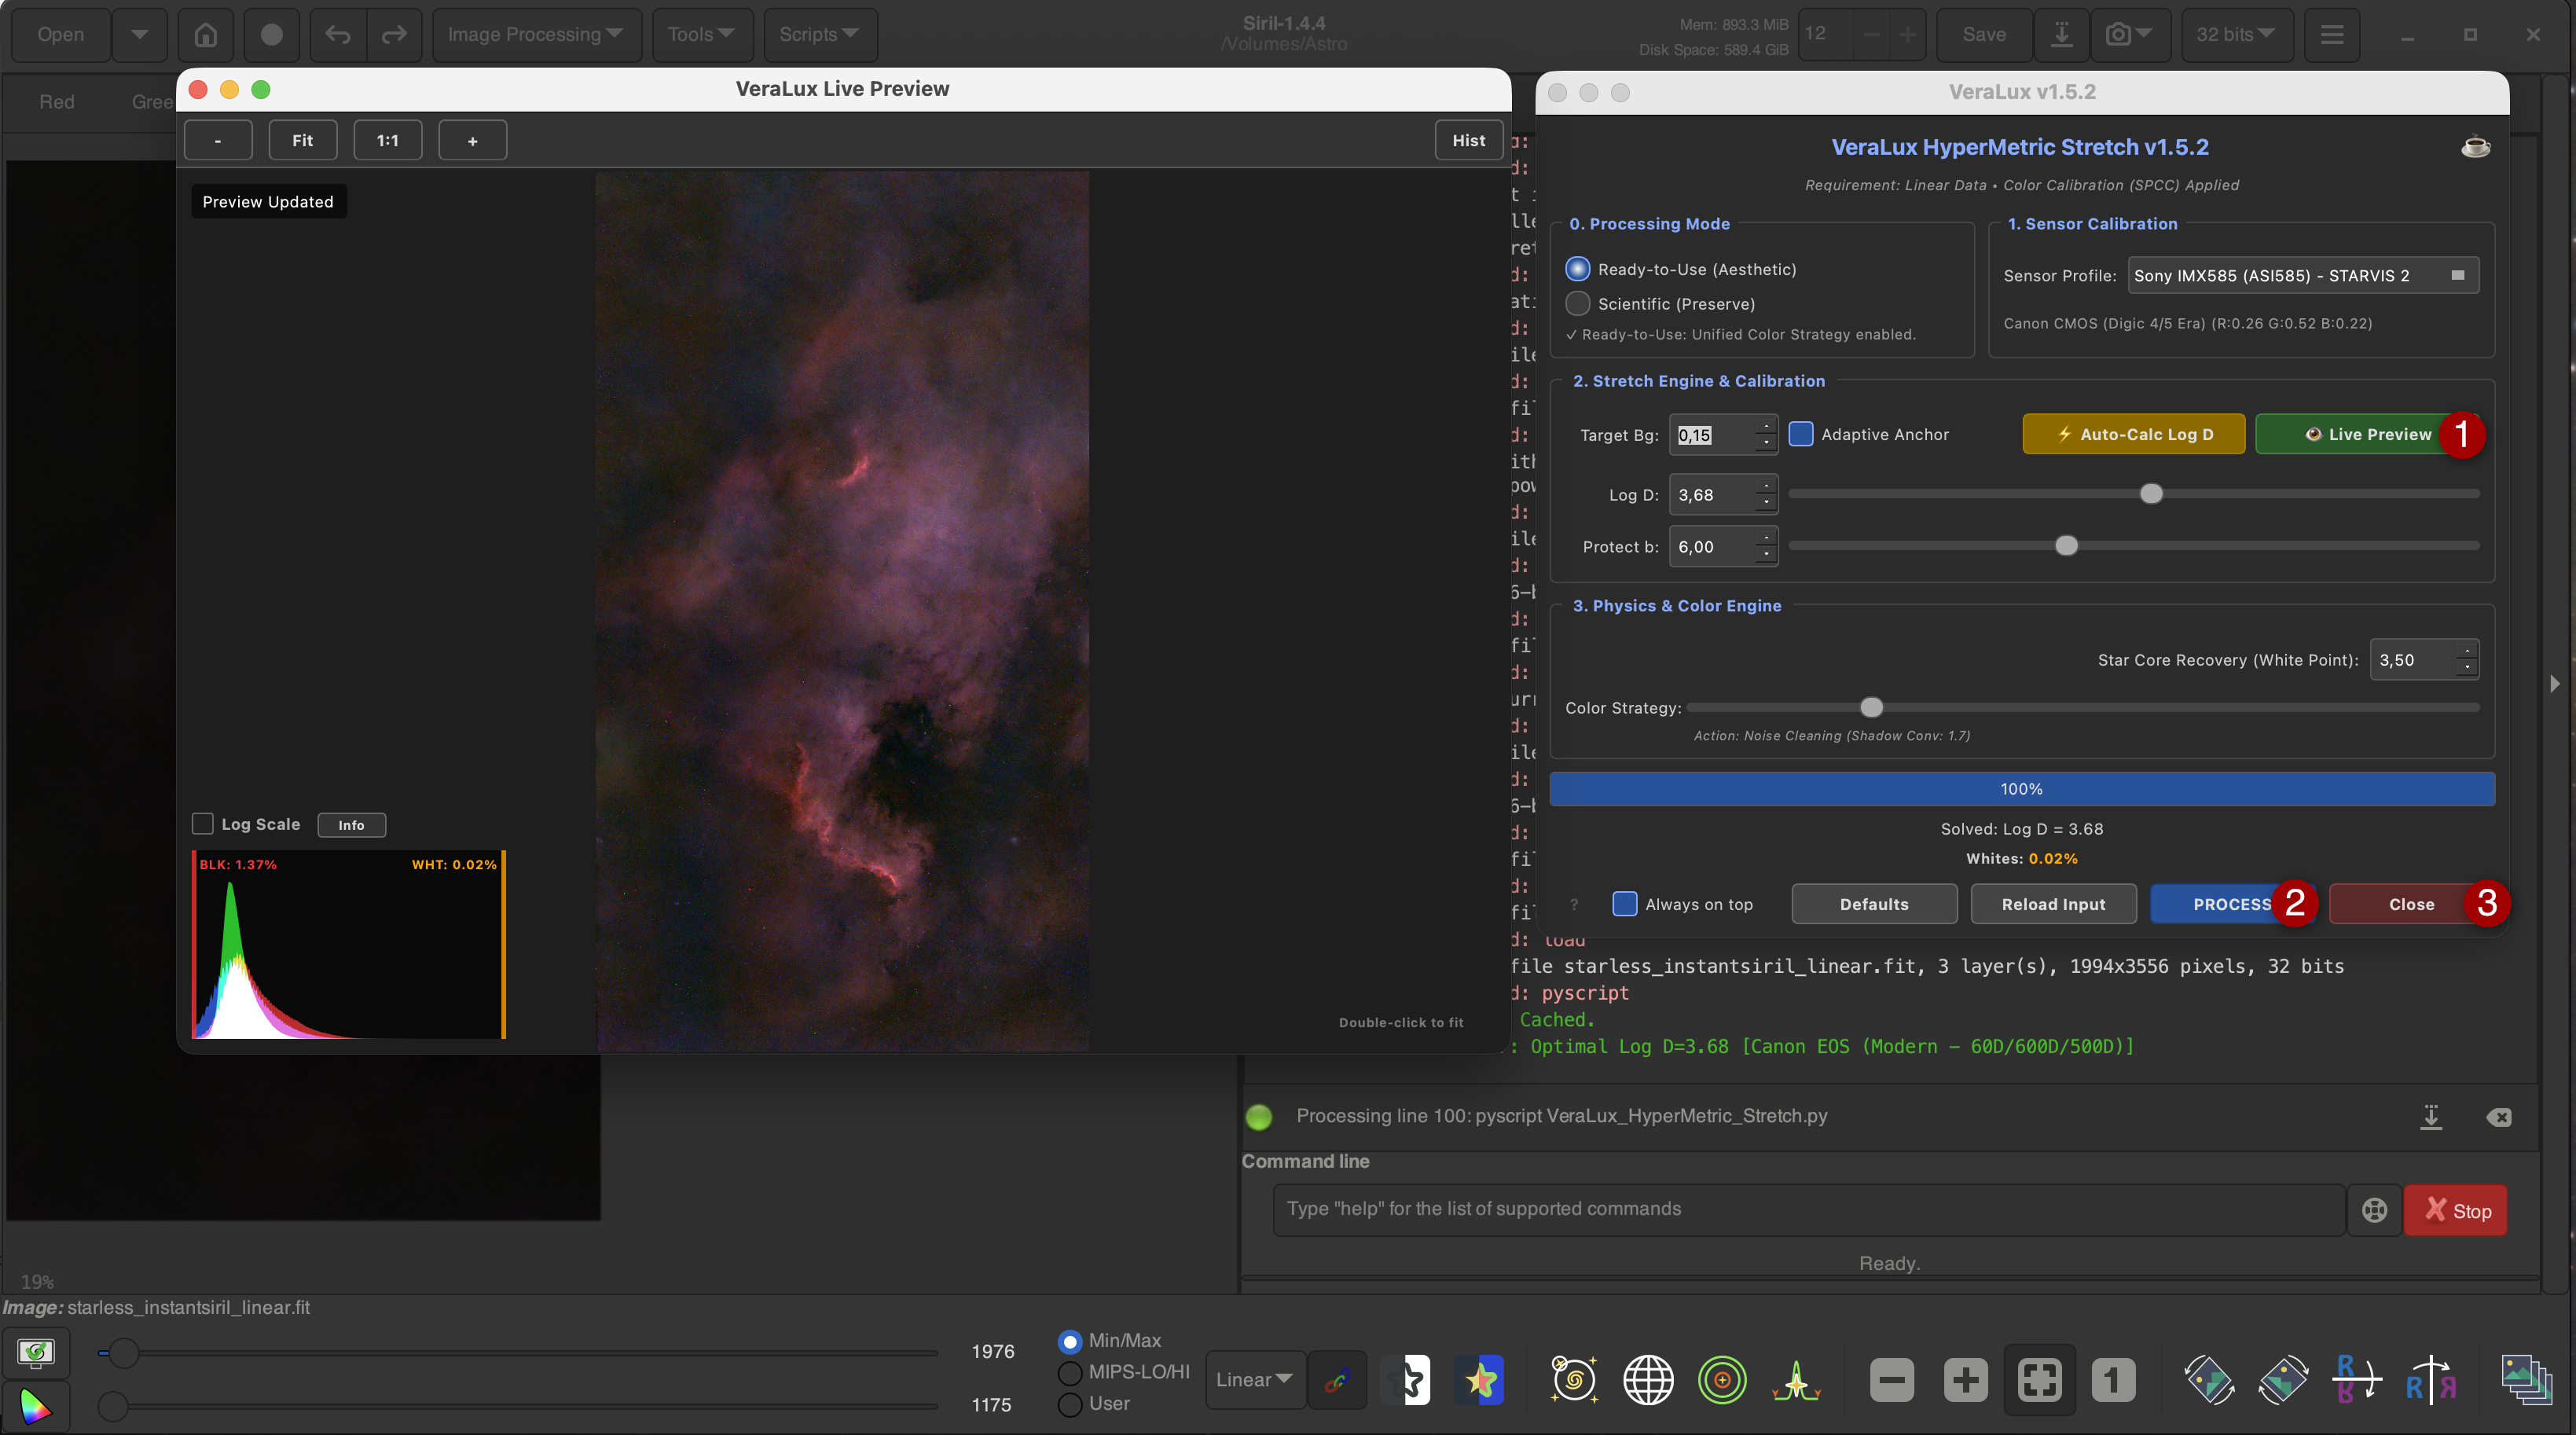
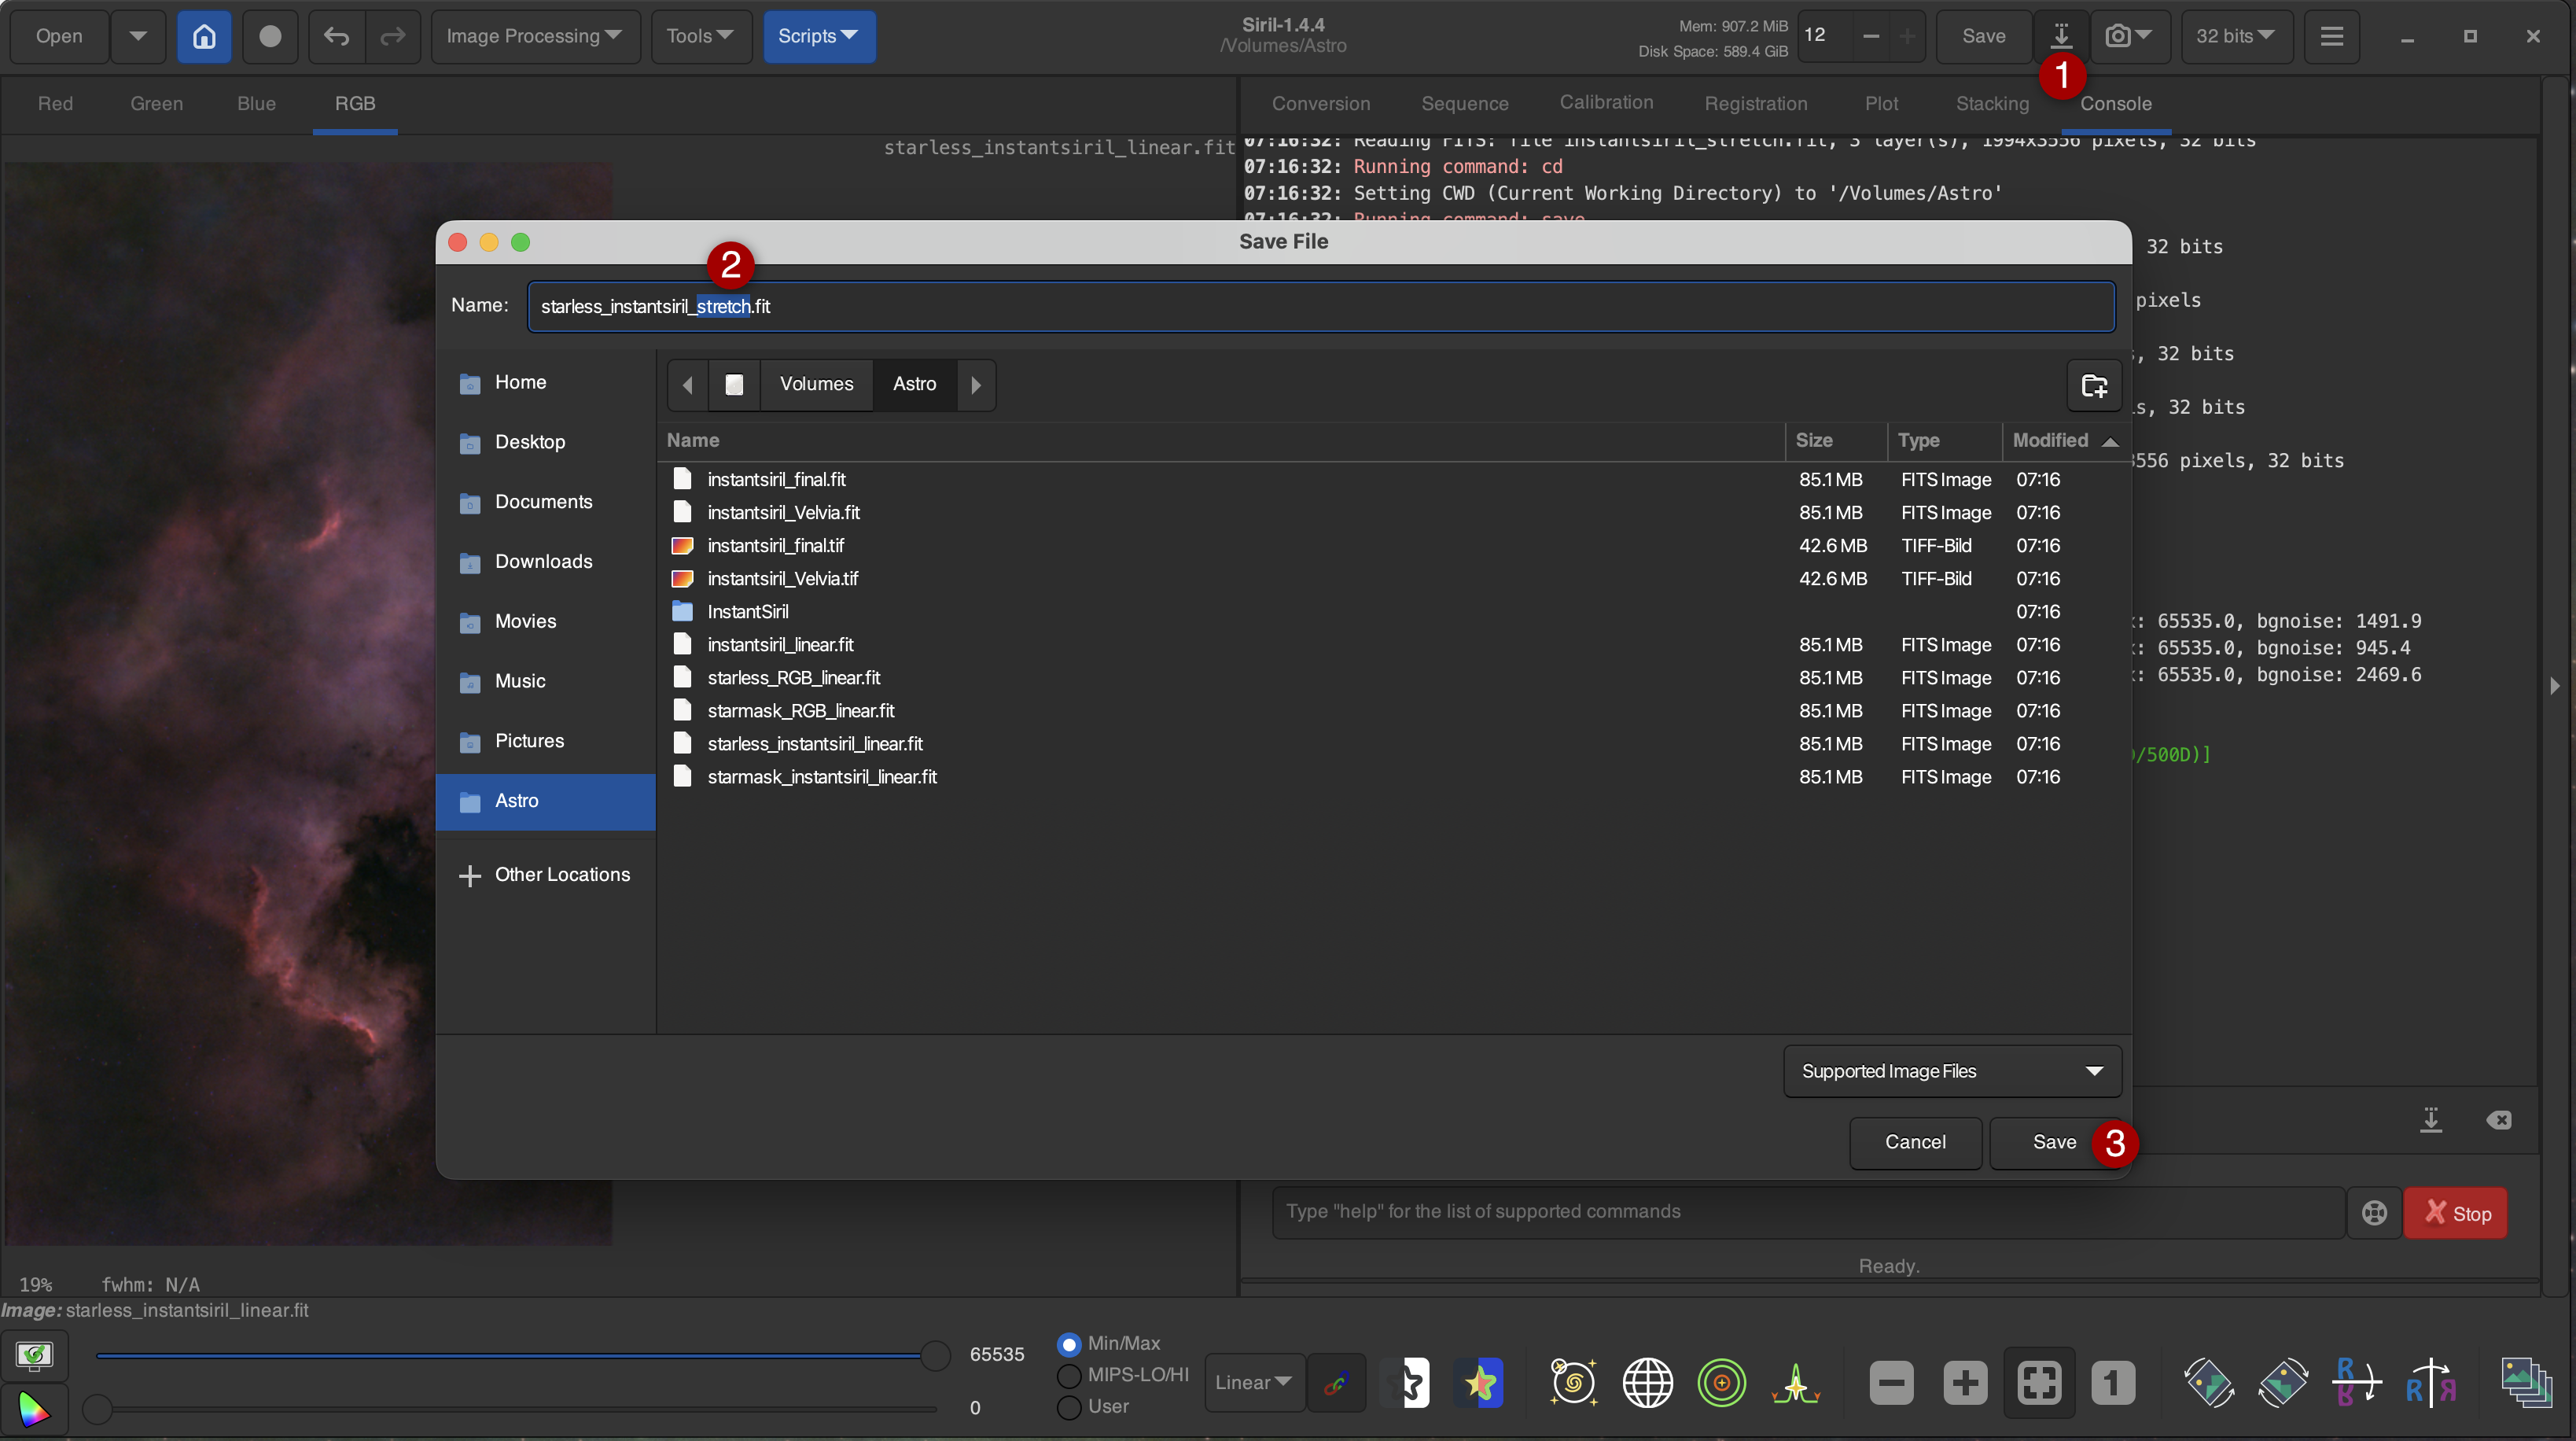
After stretching, save the result as "starless_instantsiril_stretch.fit" (32-bit).
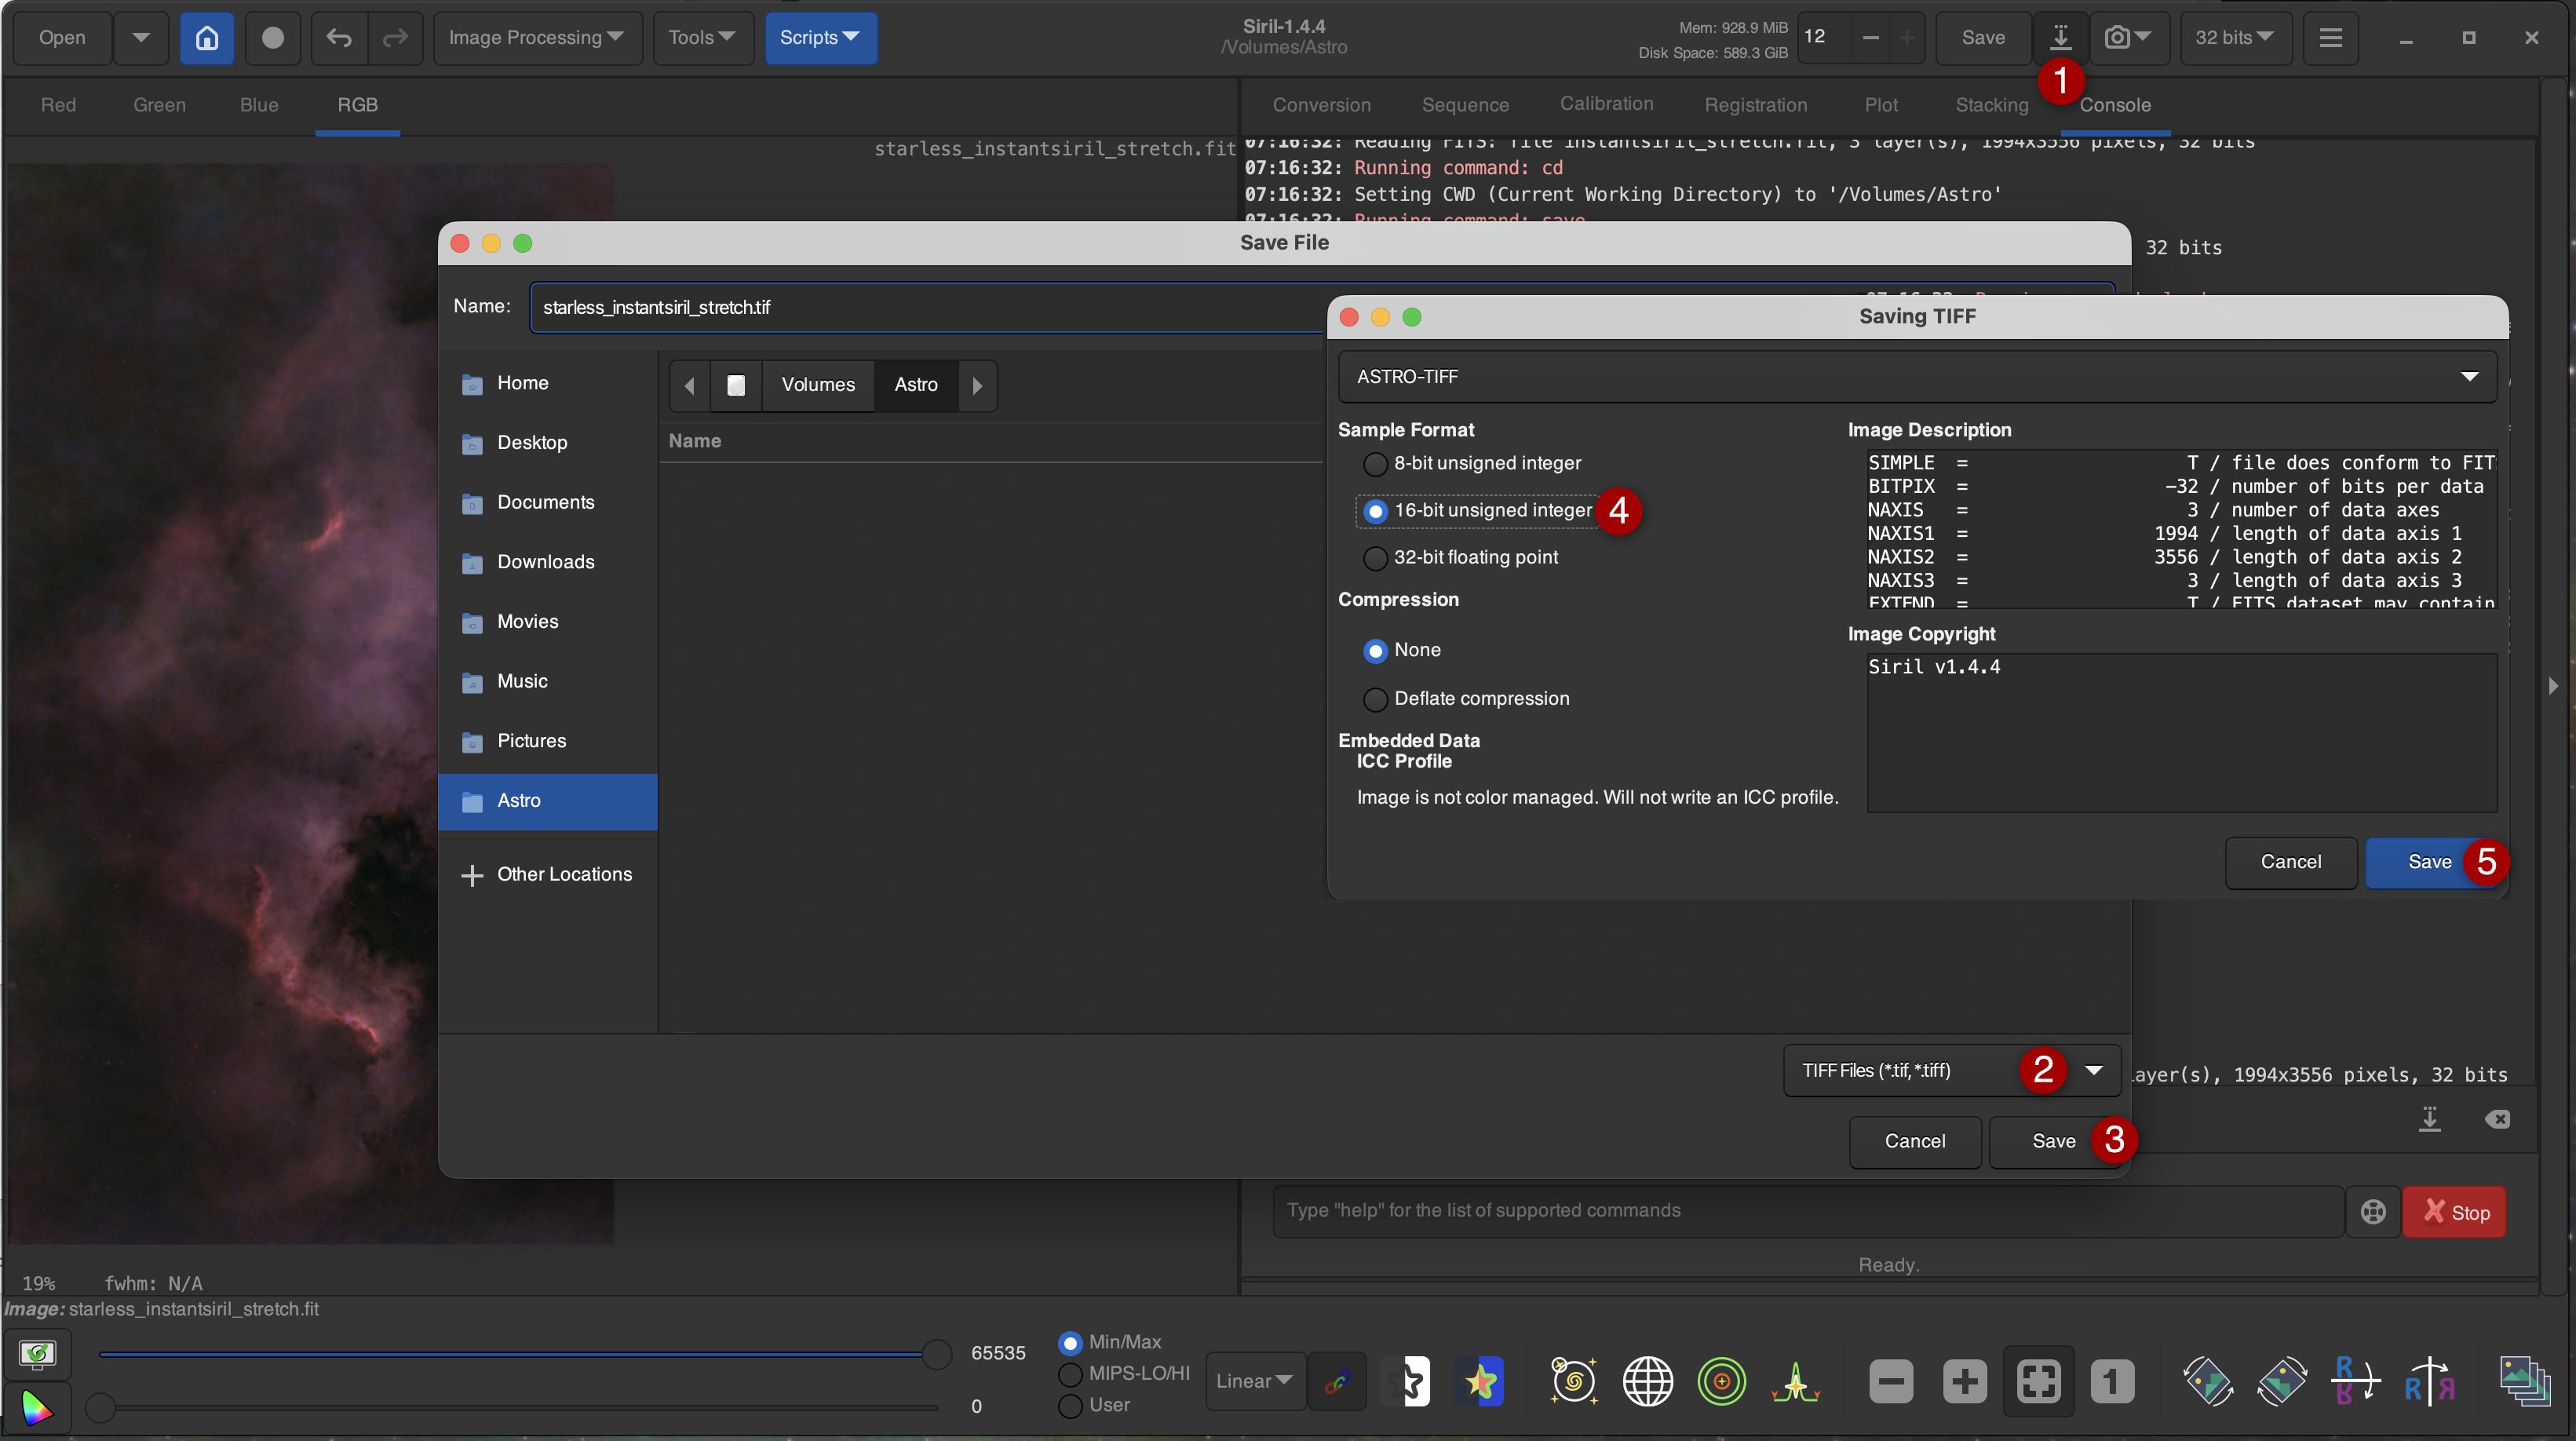
Additionally, save the result as a 16-bit TIF file. This will be used later for Affinity Photo.
With the VeraLux StarComposer, the stars and the background are merged, allowing the presence of the stars to be finely regulated.
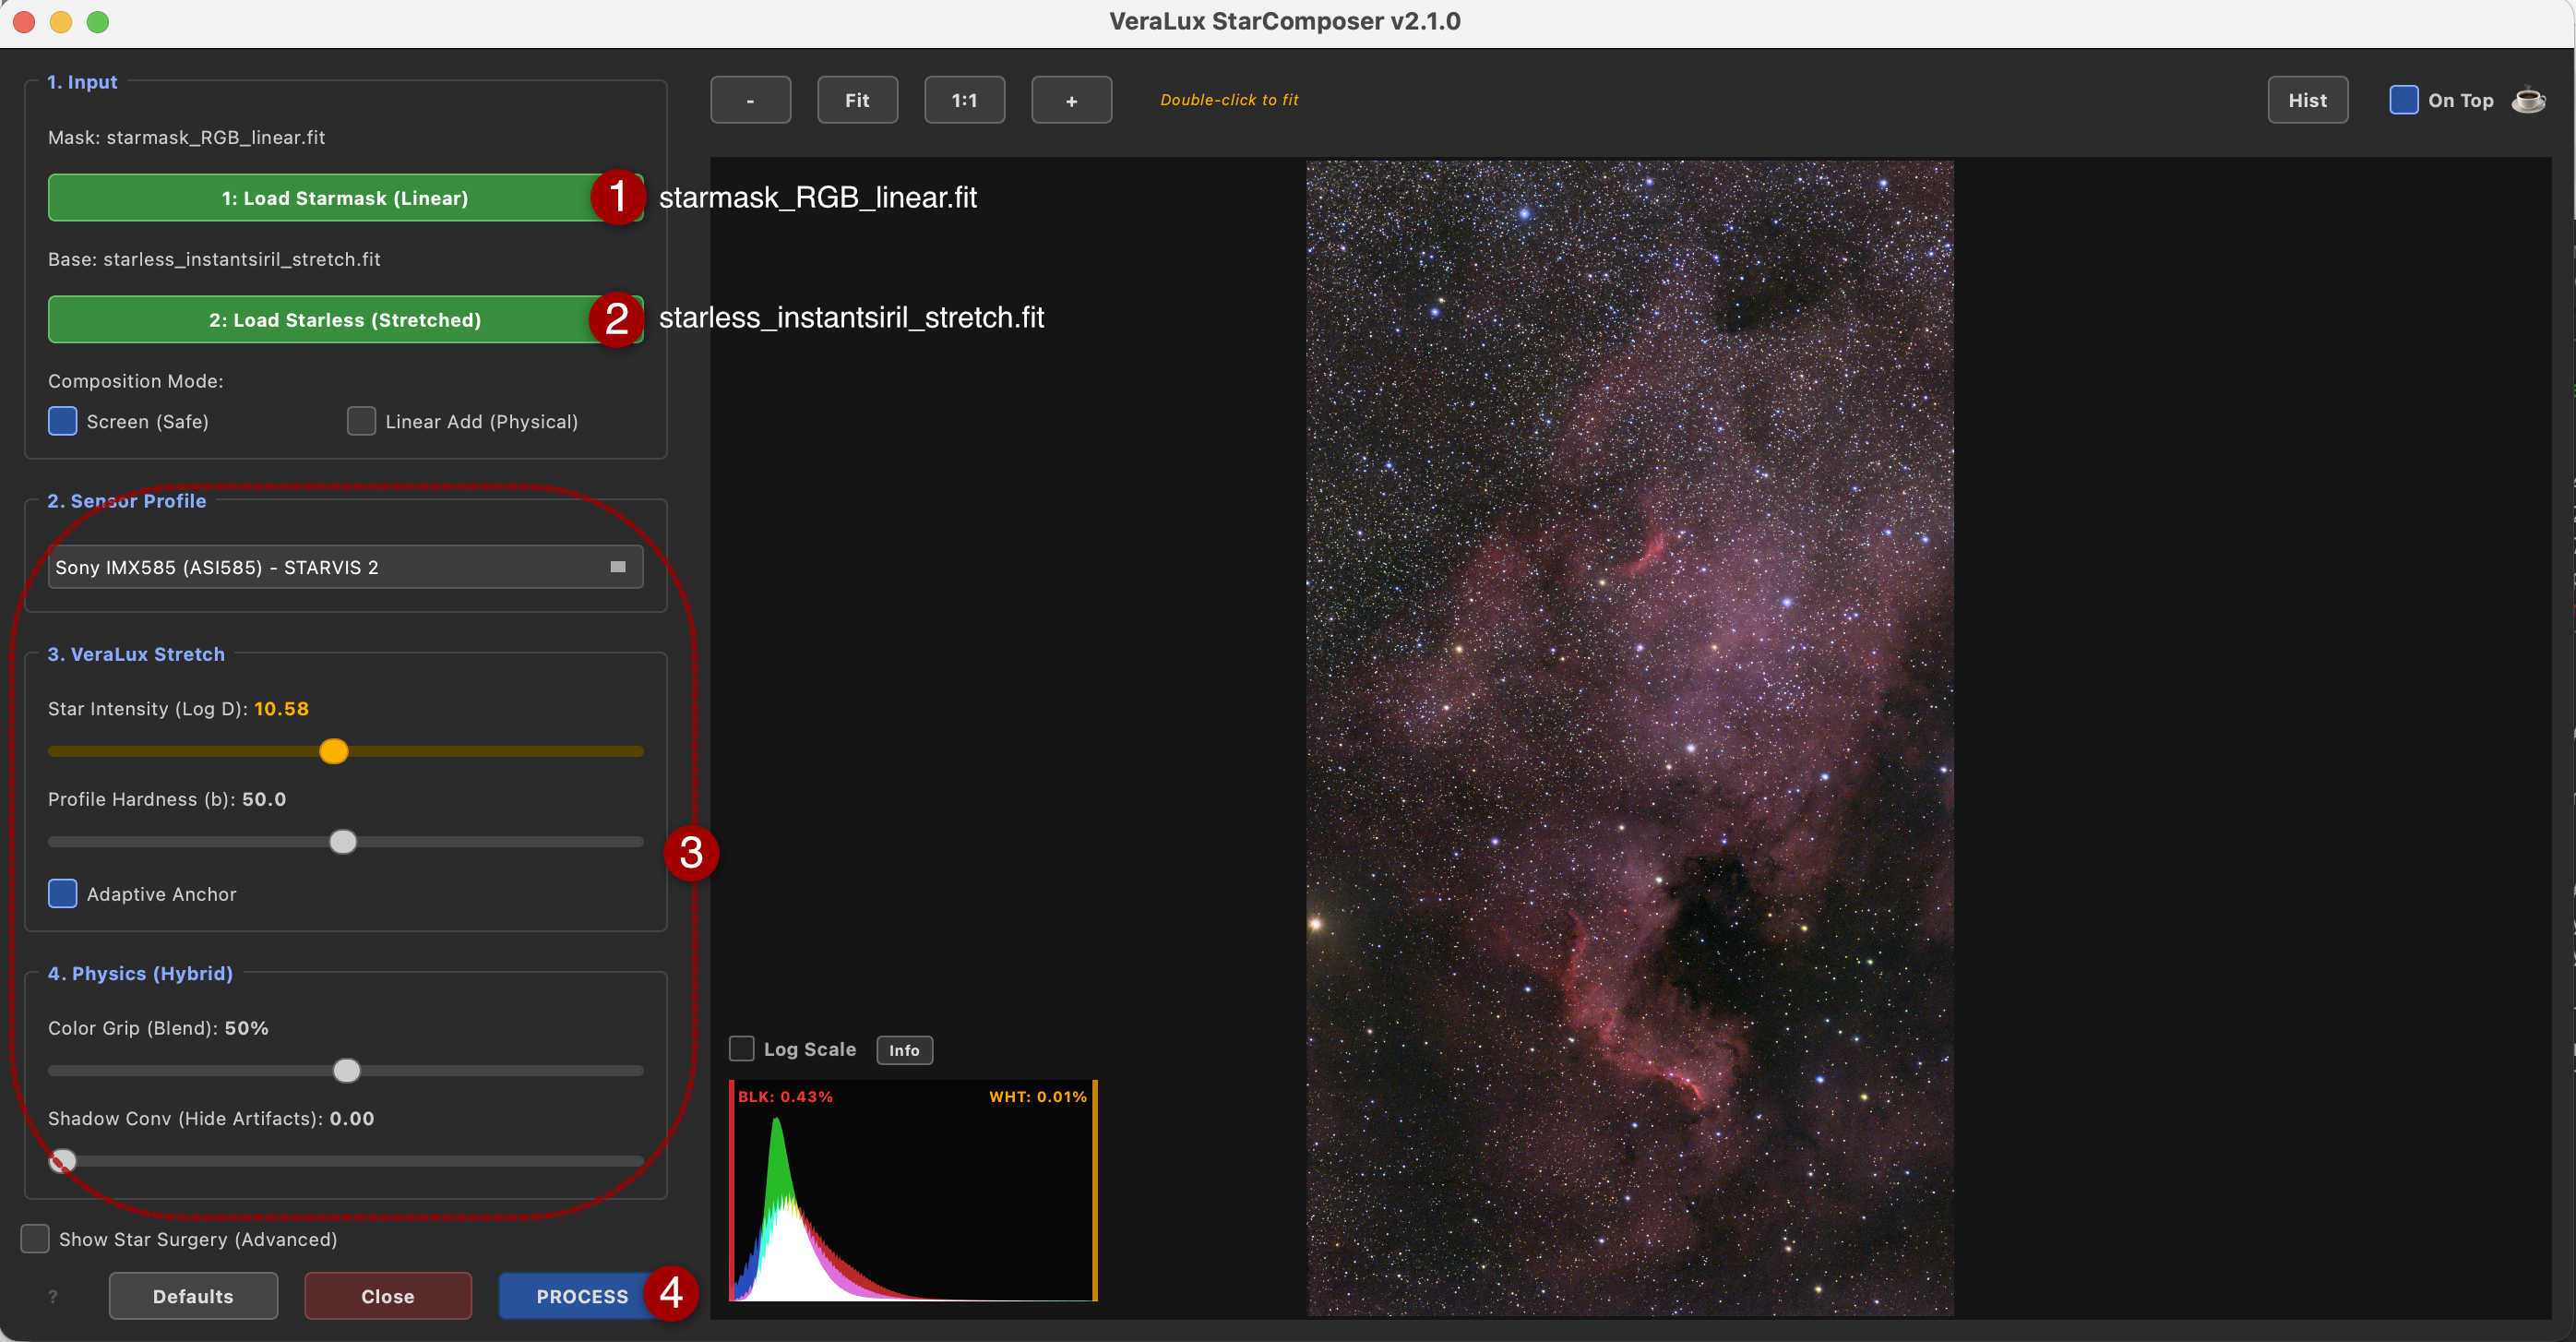
Upon execution, the tool automatically creates the file "VeraLux_StarComposer_result.fit" and the result is displayed in the Siril preview window. Also here, create another copy in 16-bit TIFF format for processing in Affinity Photo.
Next steps in Affinity Photo:
We open the files "VeraLux_StarComposer_result.tif" and "starless_instantsiril_stretch.tif", copy the StarComposer version over the starless version, and name the layers accordingly.
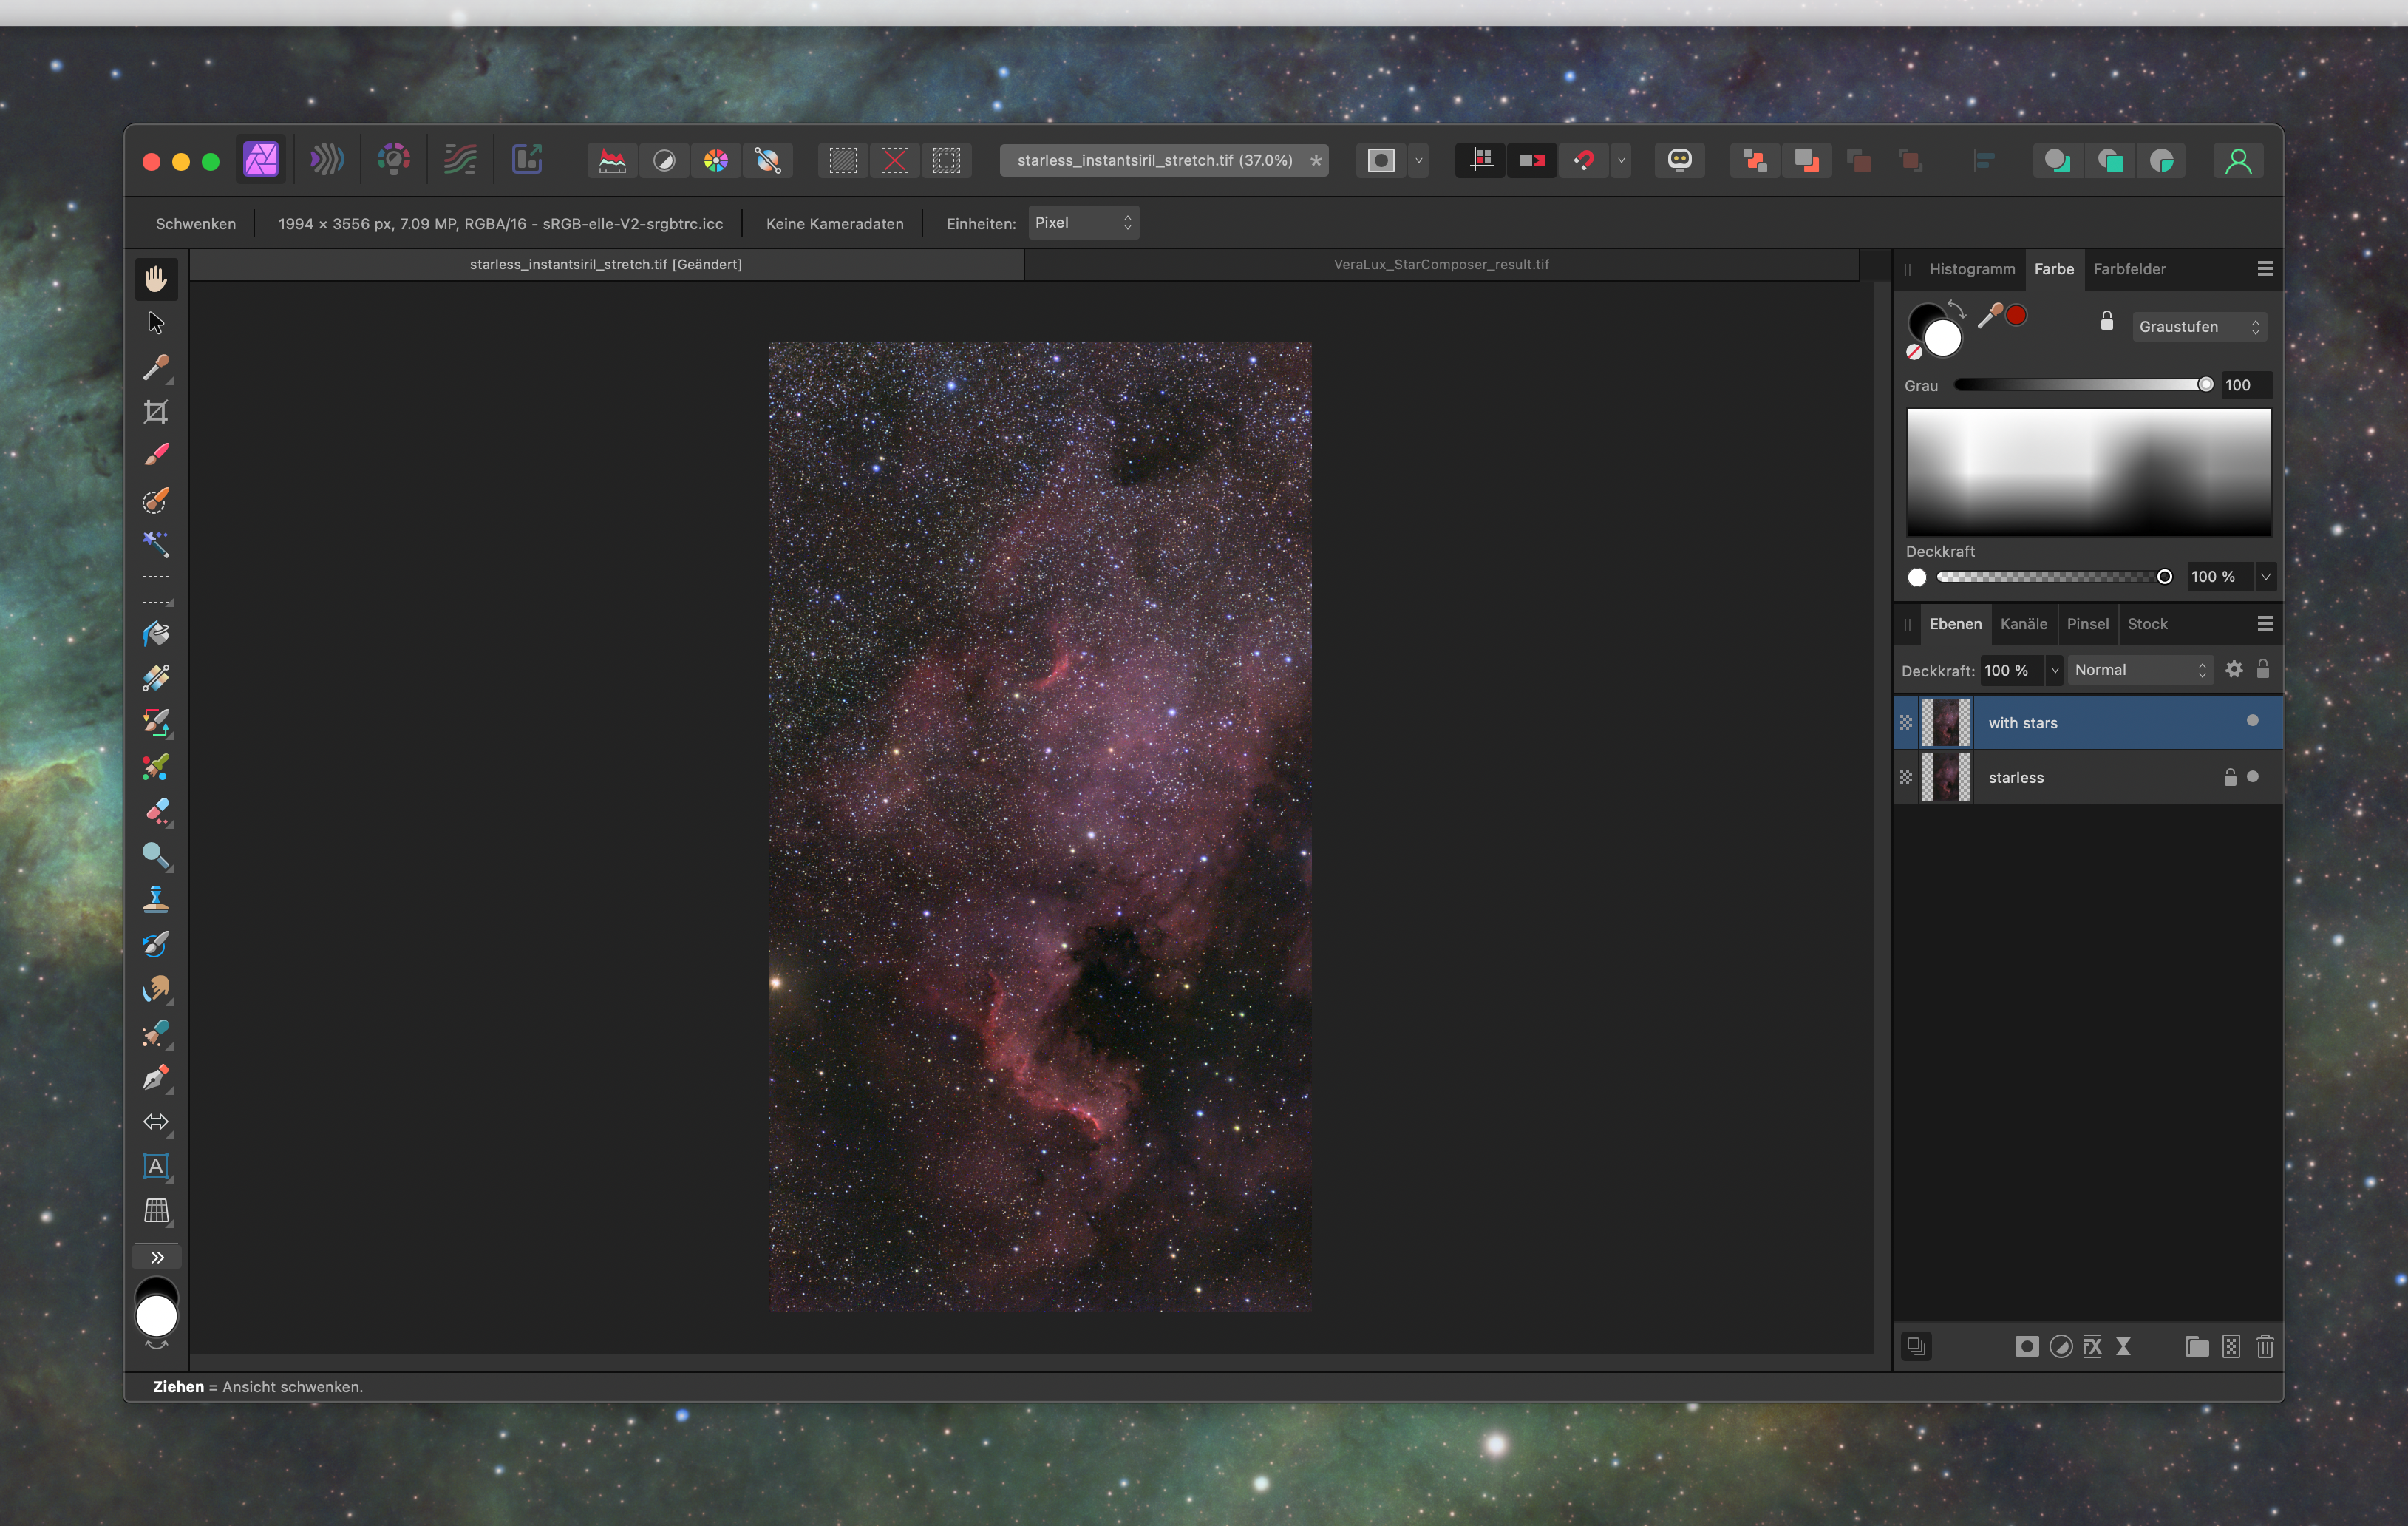
When the layer with stars is set to "Difference," only the stars appear.
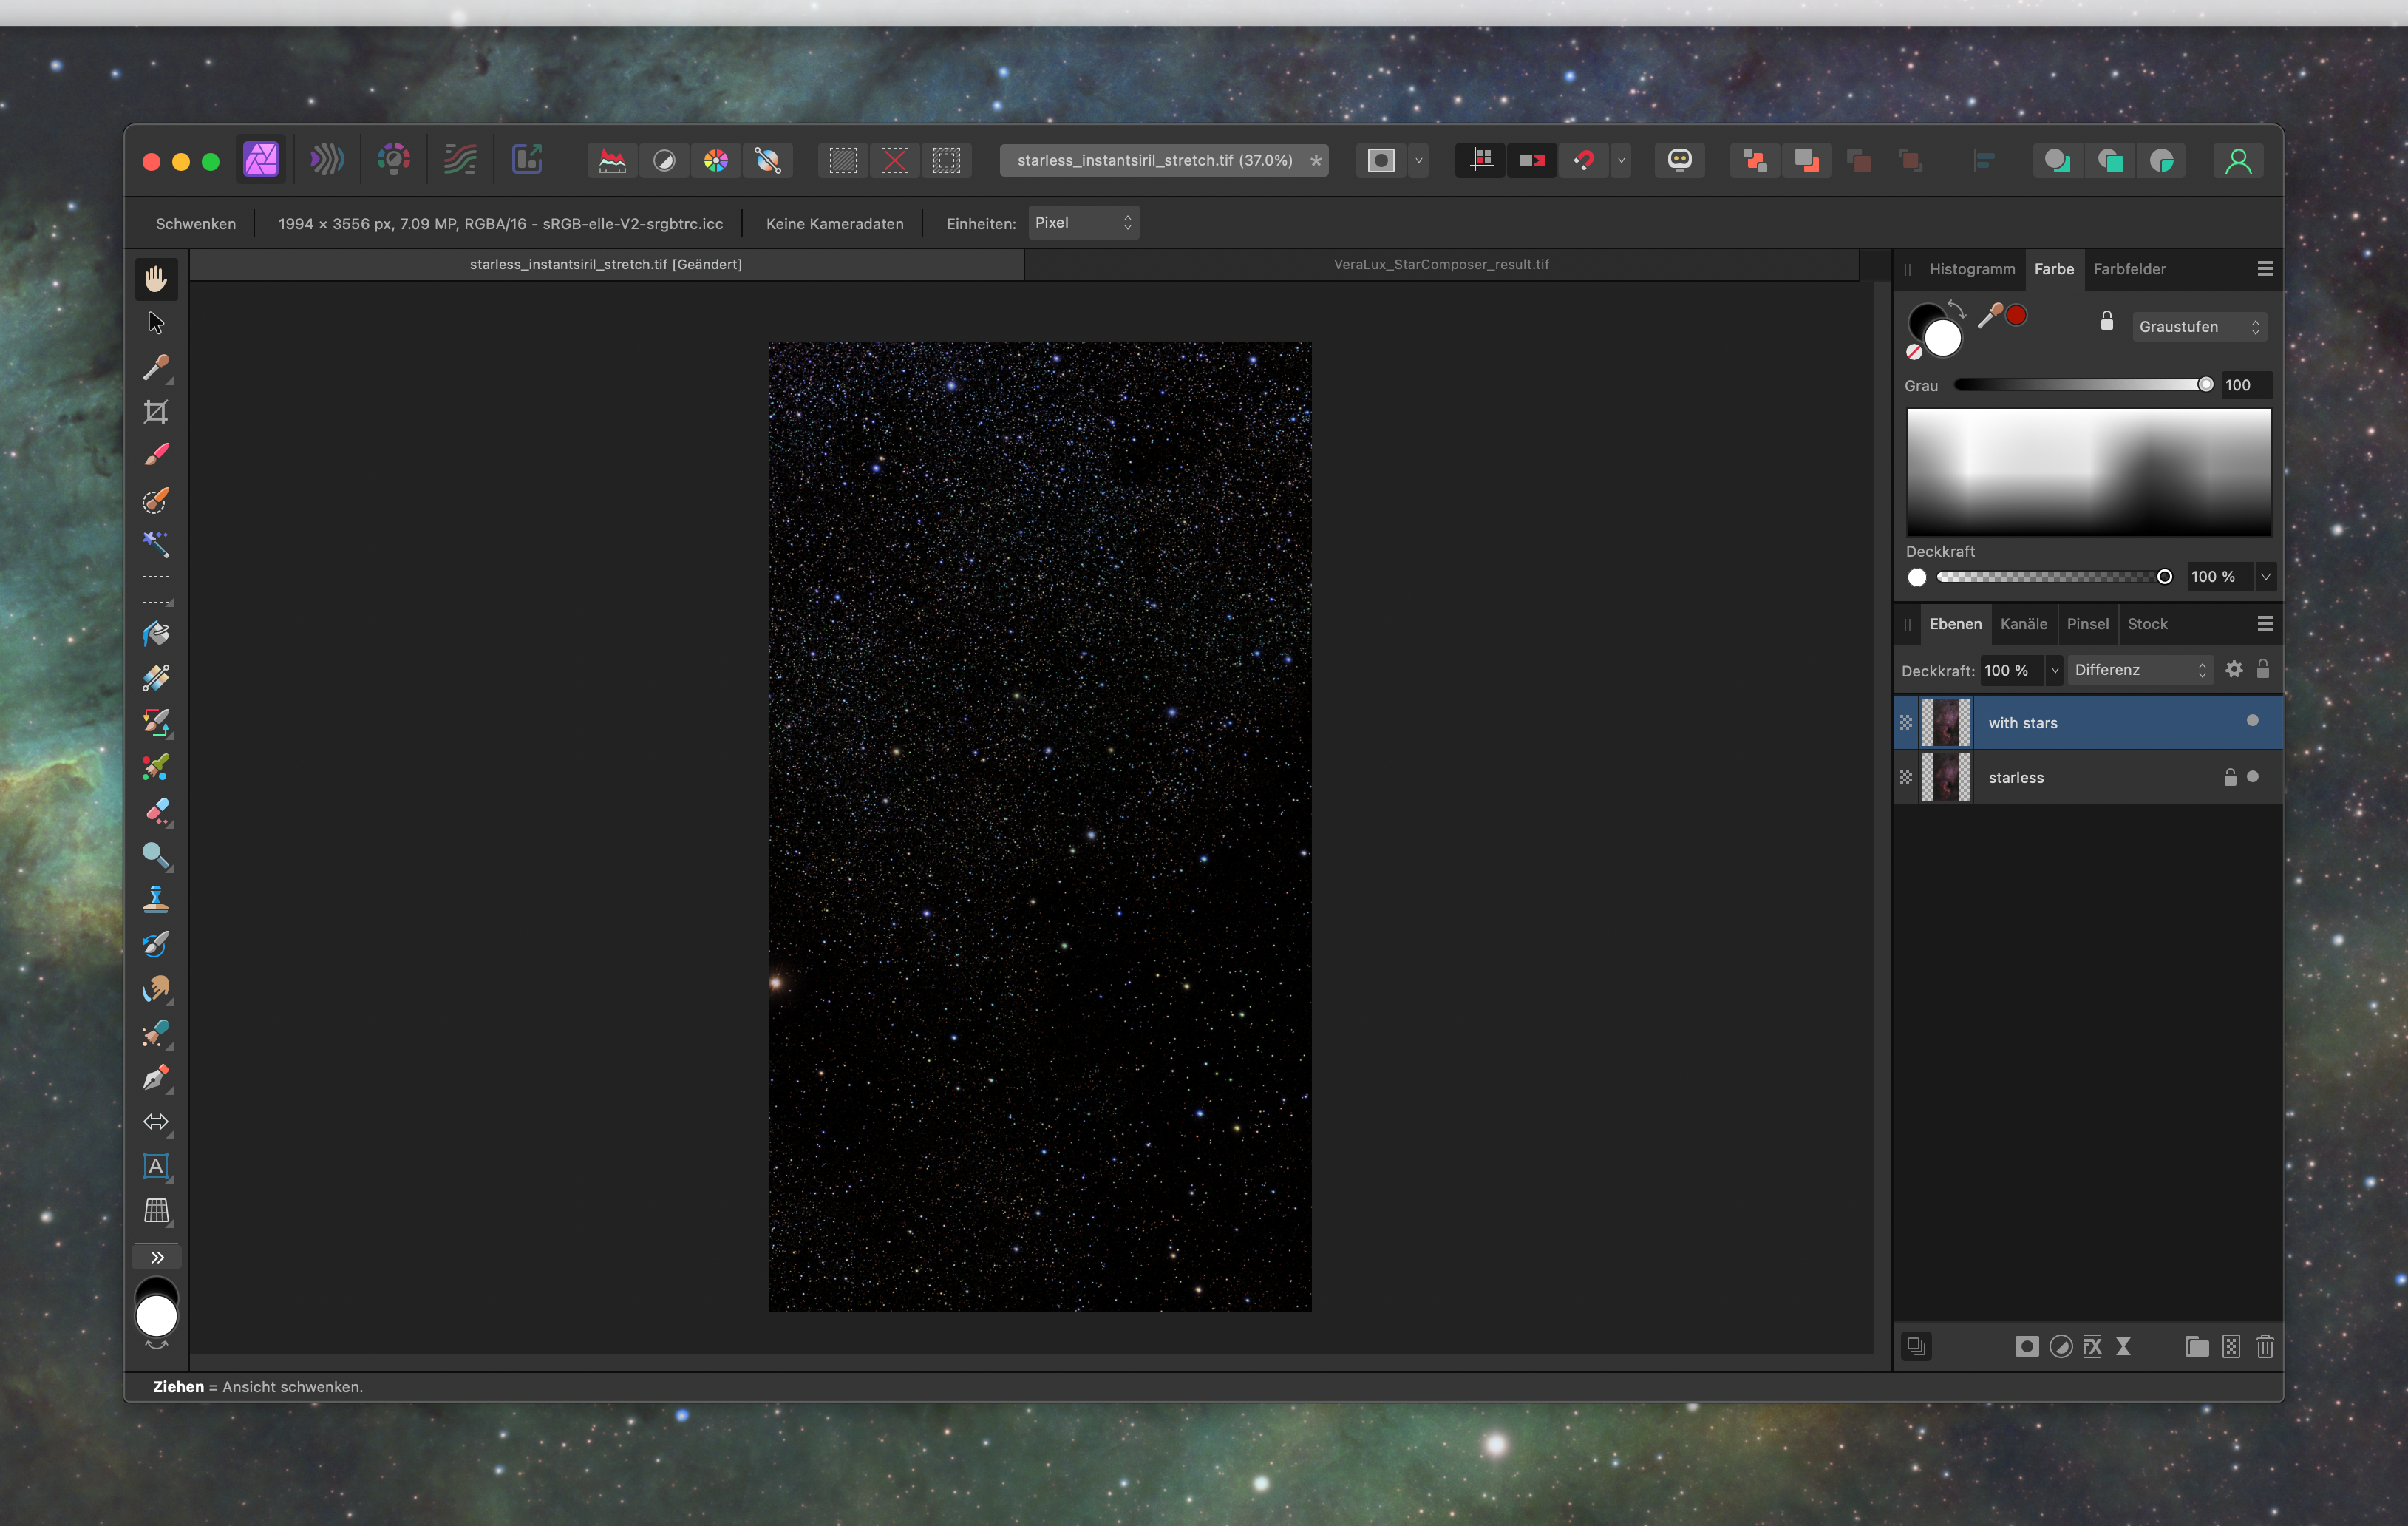
Select "Layer / Merge Visible" from the menu and name the newly created layer accordingly.
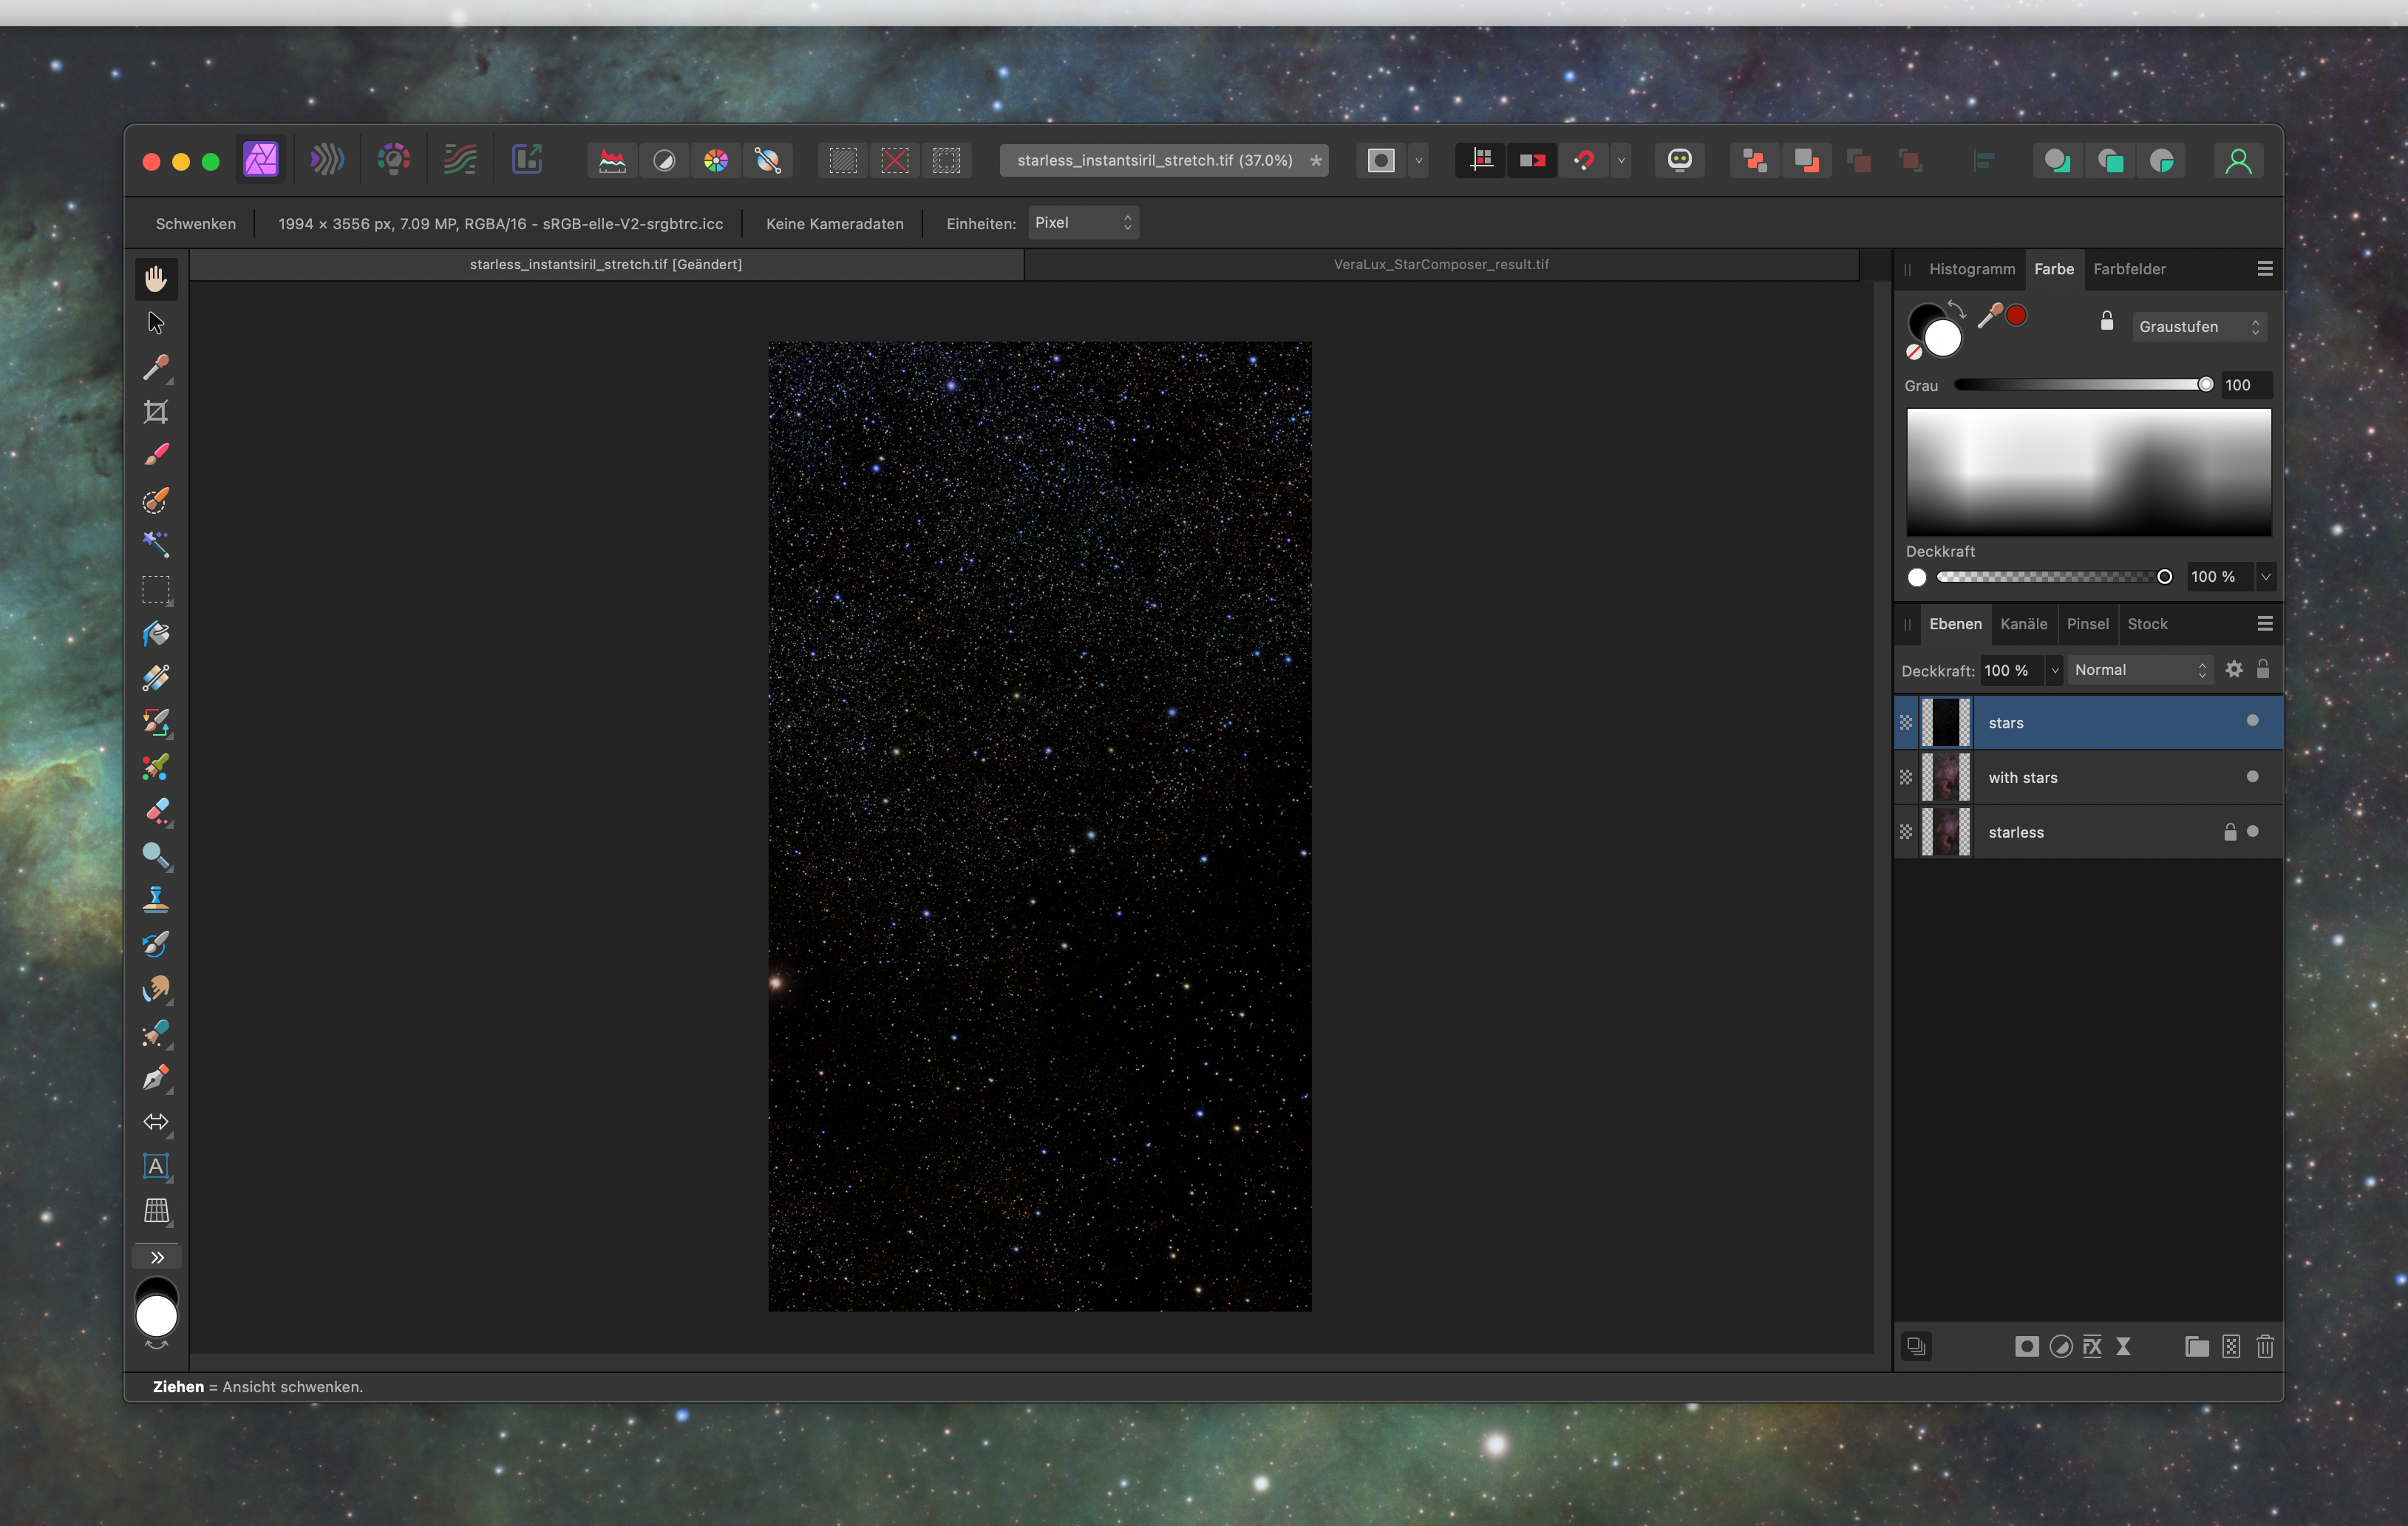
Turn off the "with Stars" layer and change the mode of the "Stars" layer to "Add."
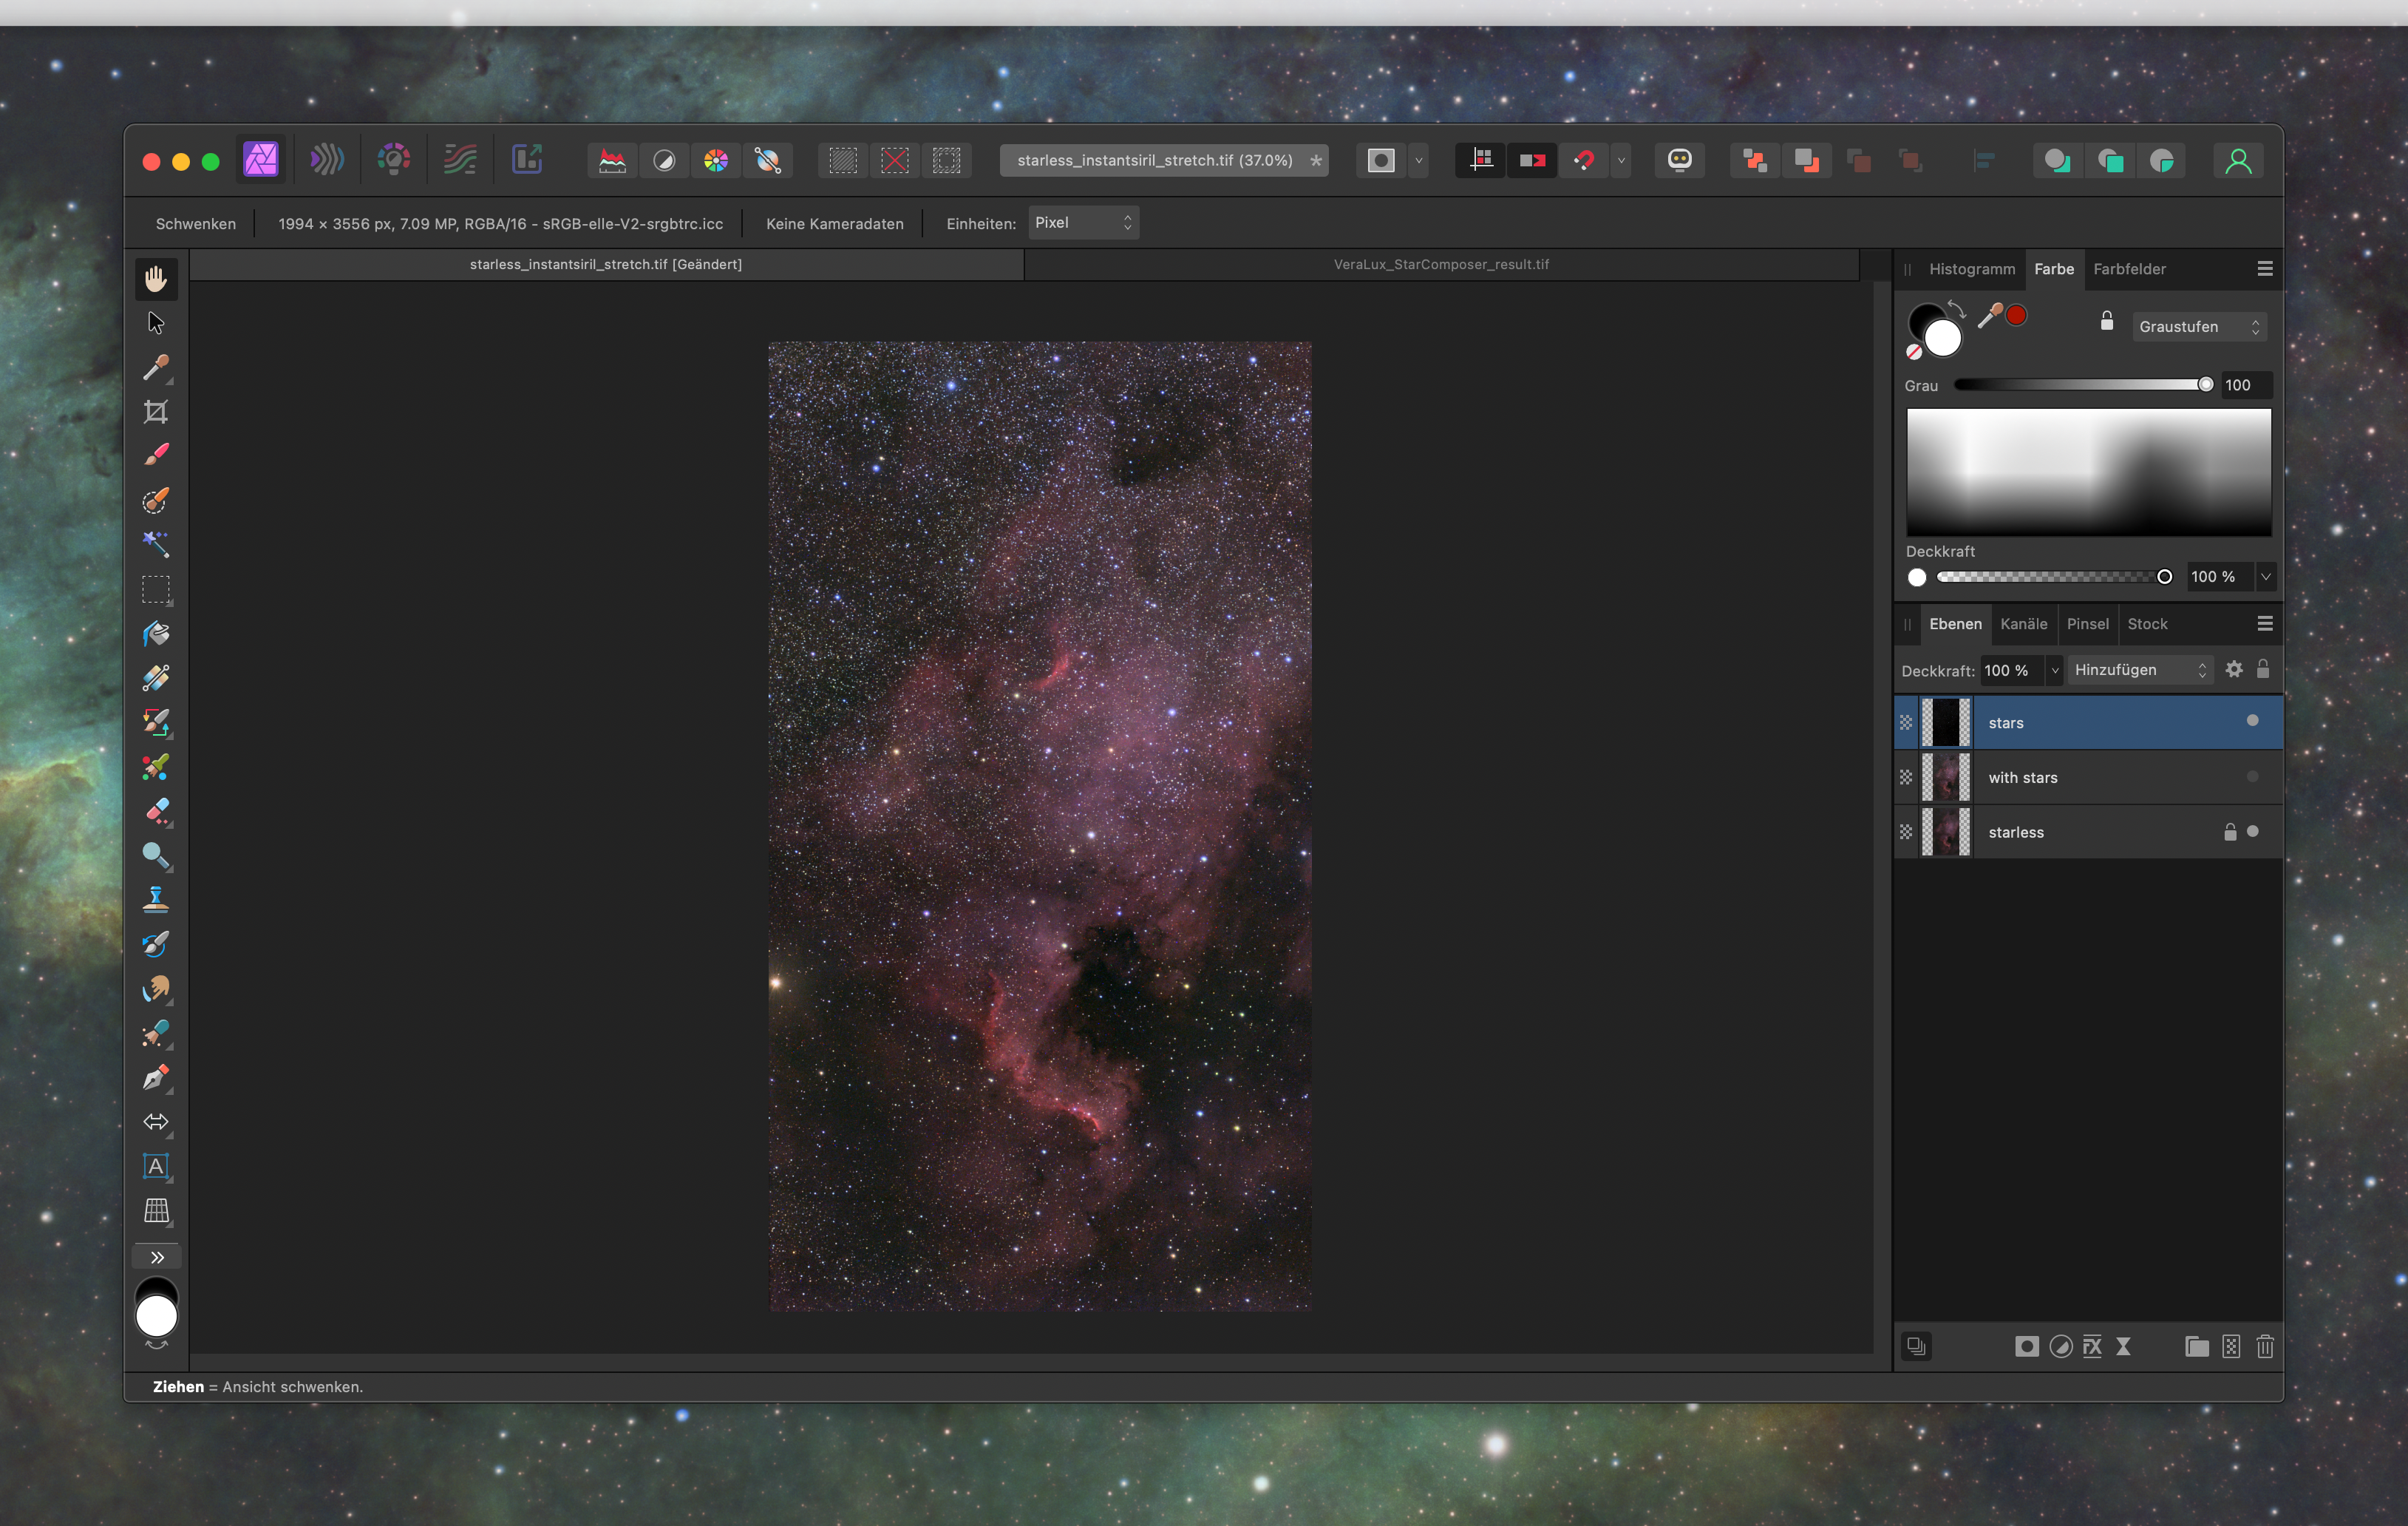
In this state, nebula structures and stars can now be edited completely separately.
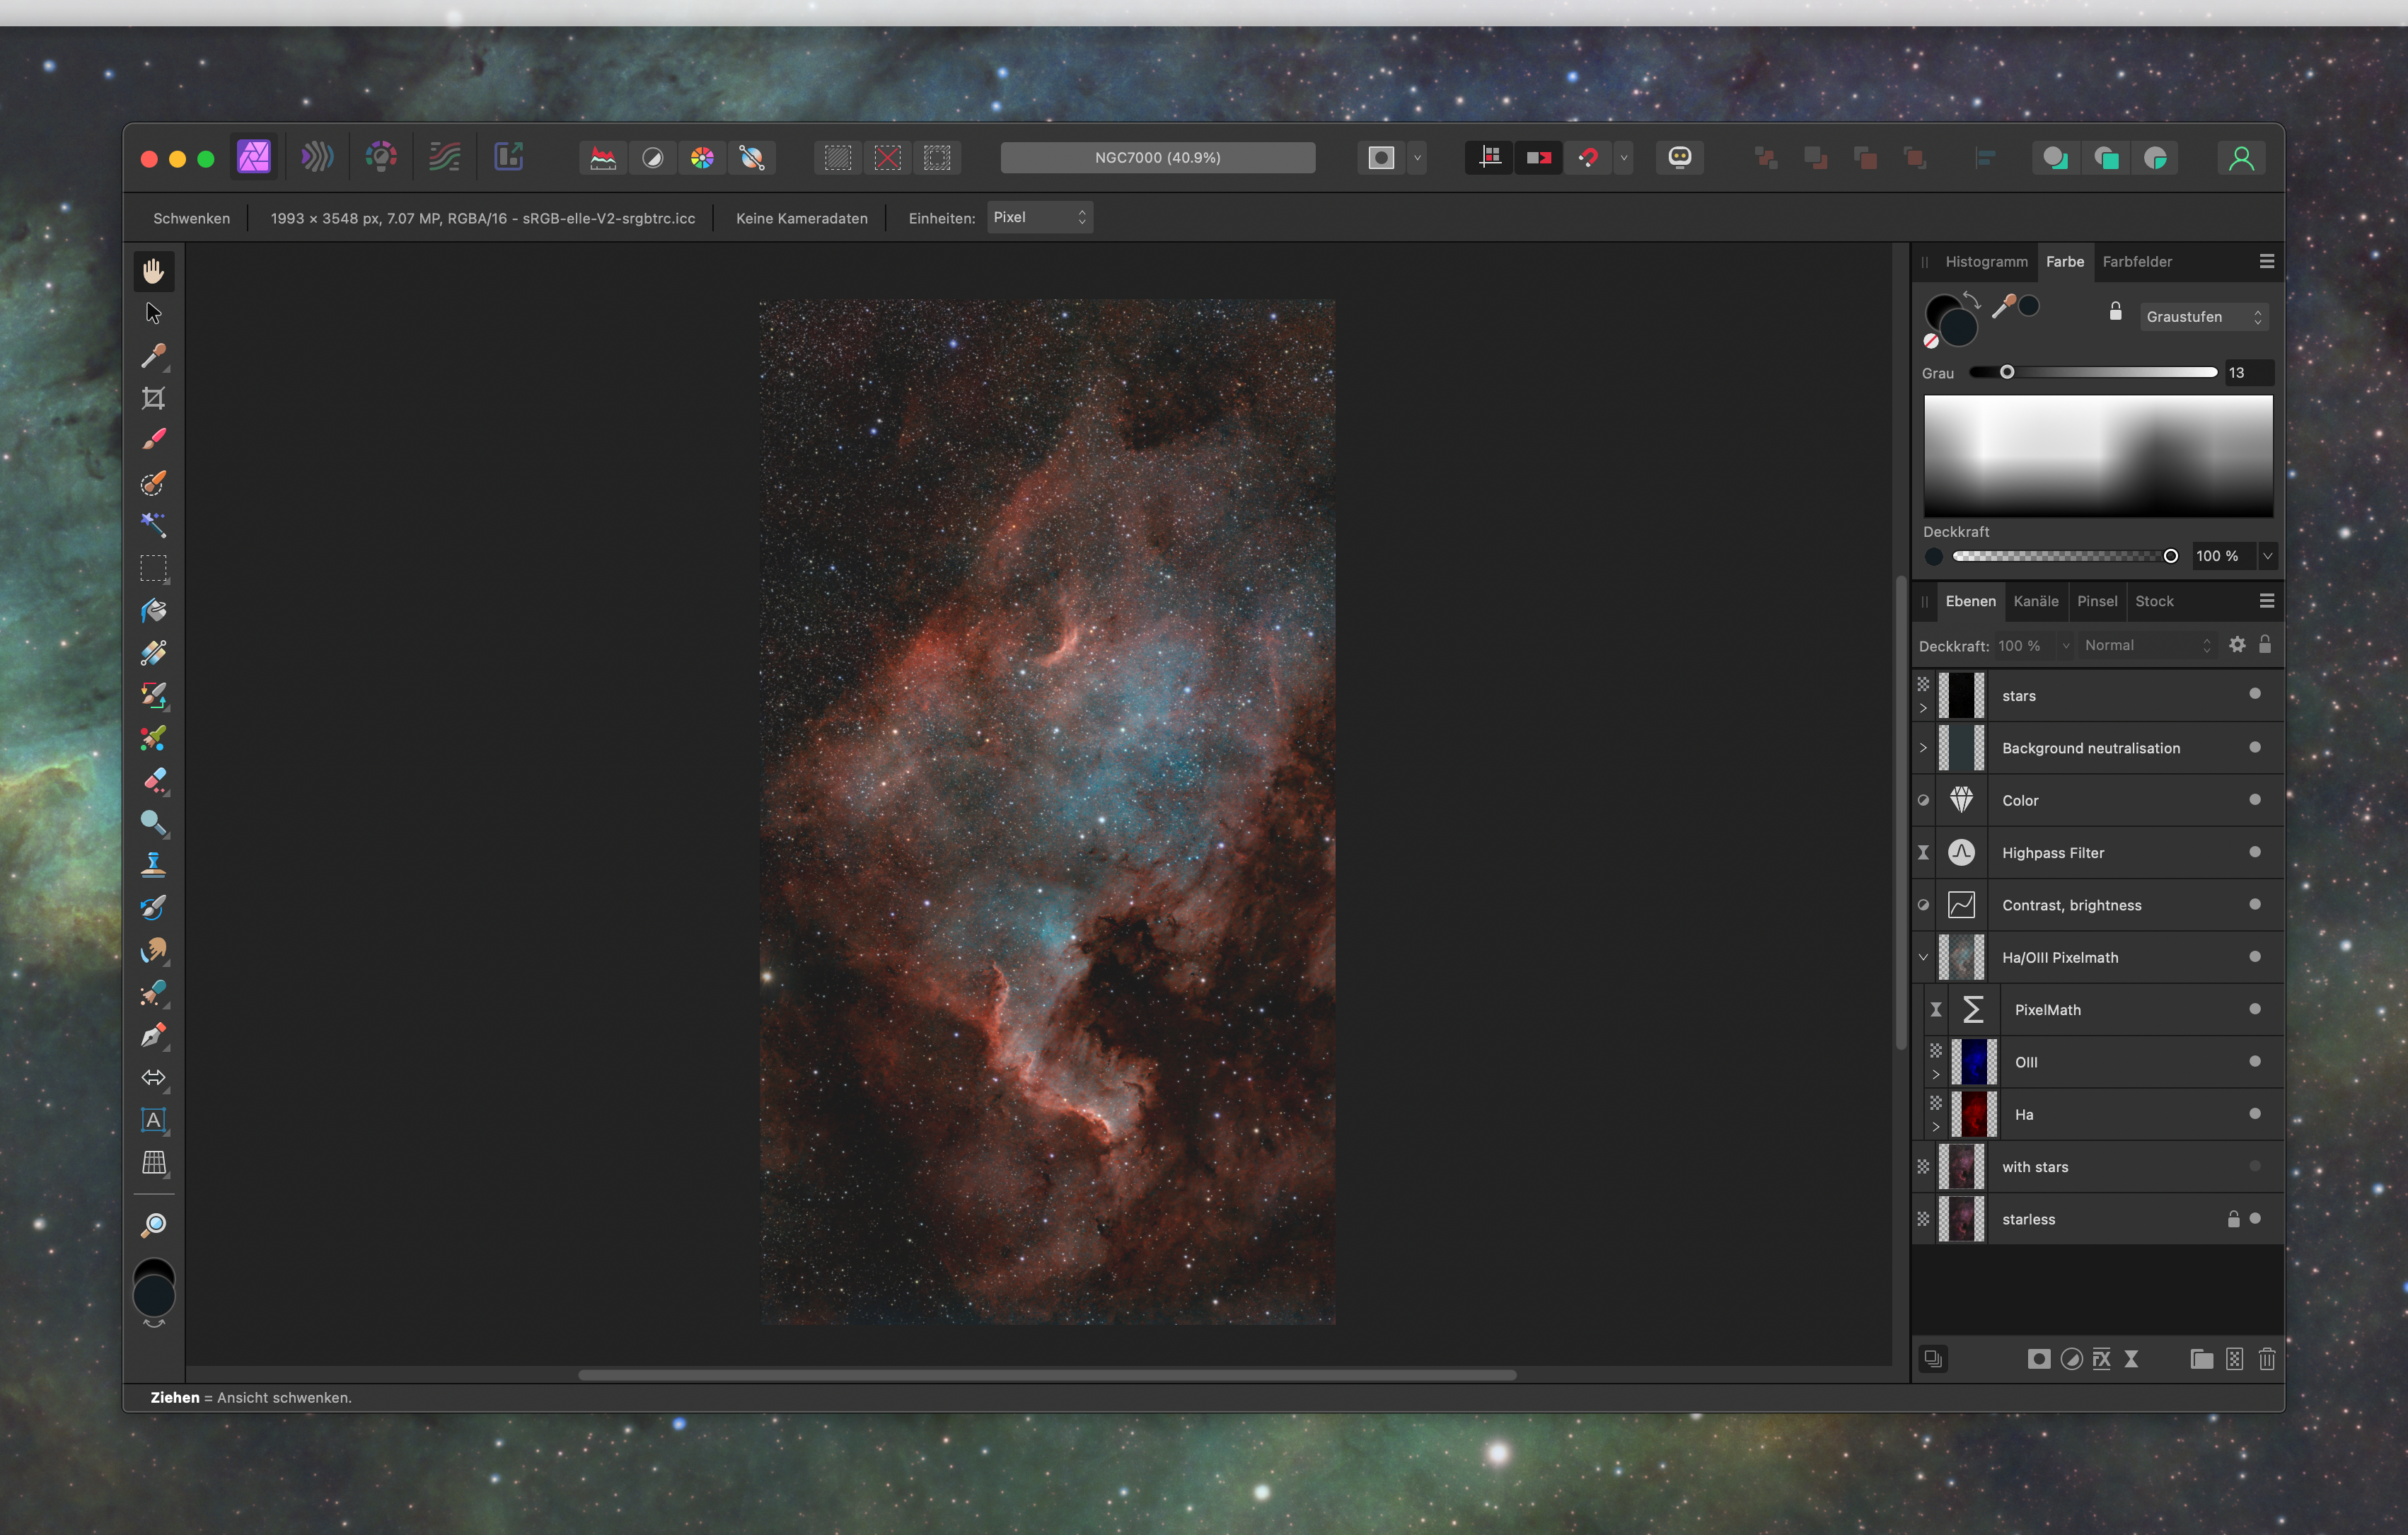
Processing IR-Cut and LP data, with separated Ha/OIII results and further processing in Affinity Photo
The dataset in this example consists of 69x60s IR-Cut captures and 176x60s LP captures.
Settings:
- veralux_stretch = true
- veralux_starless = true
- VeraLux Stretch with "starless_RGB_linear.fit" as described above
- VeraLux StarComposer with "starmask_RGB_linear.fit" and the newly created "starless_RGB_stretch.fit"
- VeraLux Stretch of "starless_Ha.fit" and "starless_OIII.fit"
Comets
Processing comets requires a modified procedure, since these objects move relatively quickly against the background of the sky. In order for InstantSiril to be able to focus the image on the comet, we must specify the comet's ID number in advance. We can determine this via JPL Horizons. In this example, we search for the comet "220P/McNaught":
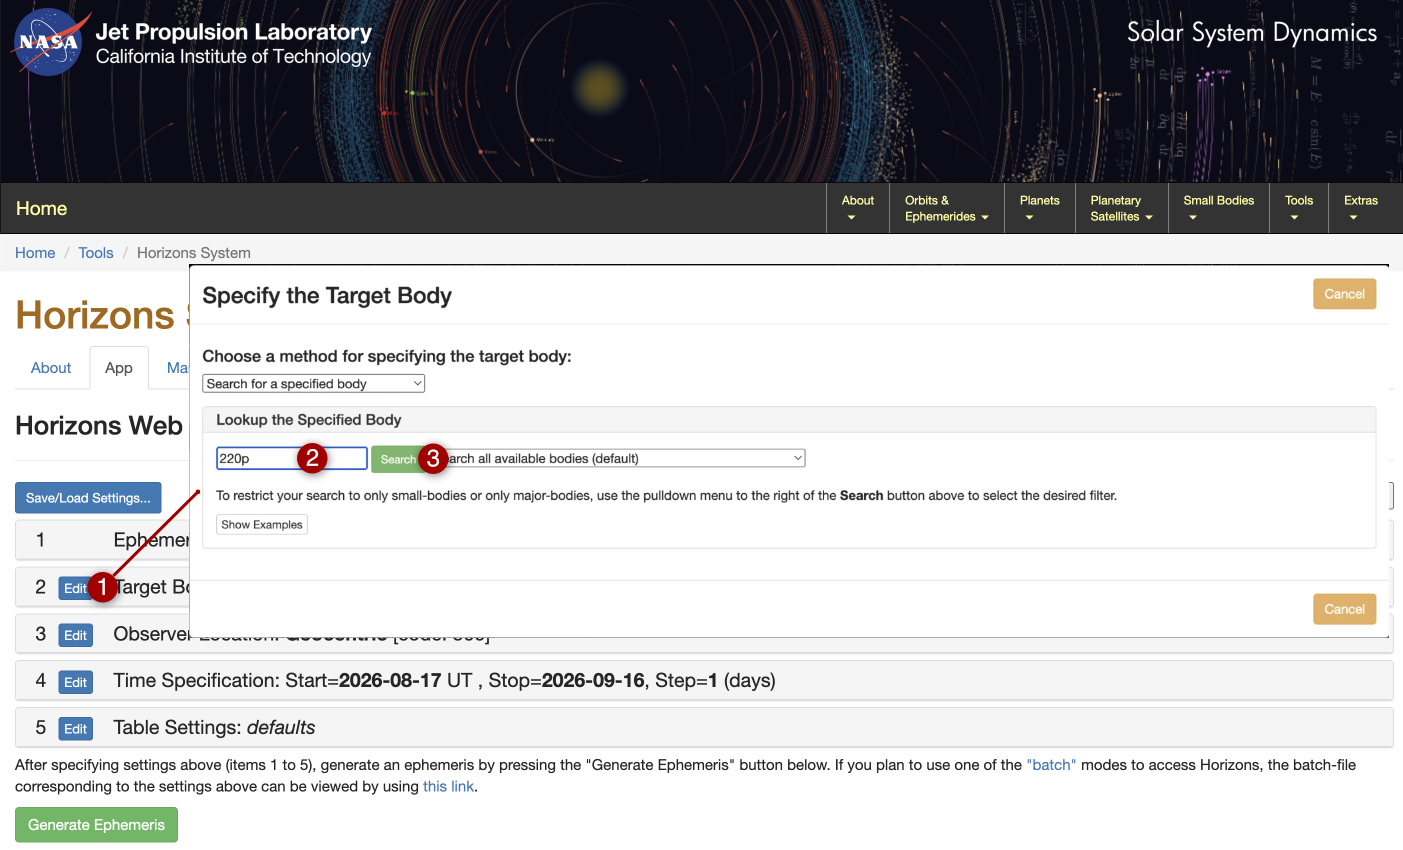
Since we are only looking for the ID, location and time are not relevant here. After a successful search, click "Generate Ephemeris," and the ID number we are looking for will appear right at the beginning of the report. This must be entered into the local settings. The comet function must also be activated here. We obtain the local settings by launching InstantSiril with the comet data and running the script "Instantsiril object settings." Please remember to restart InstantSiril with the comet data after changing the local settings, in order to generate the modified processing script.
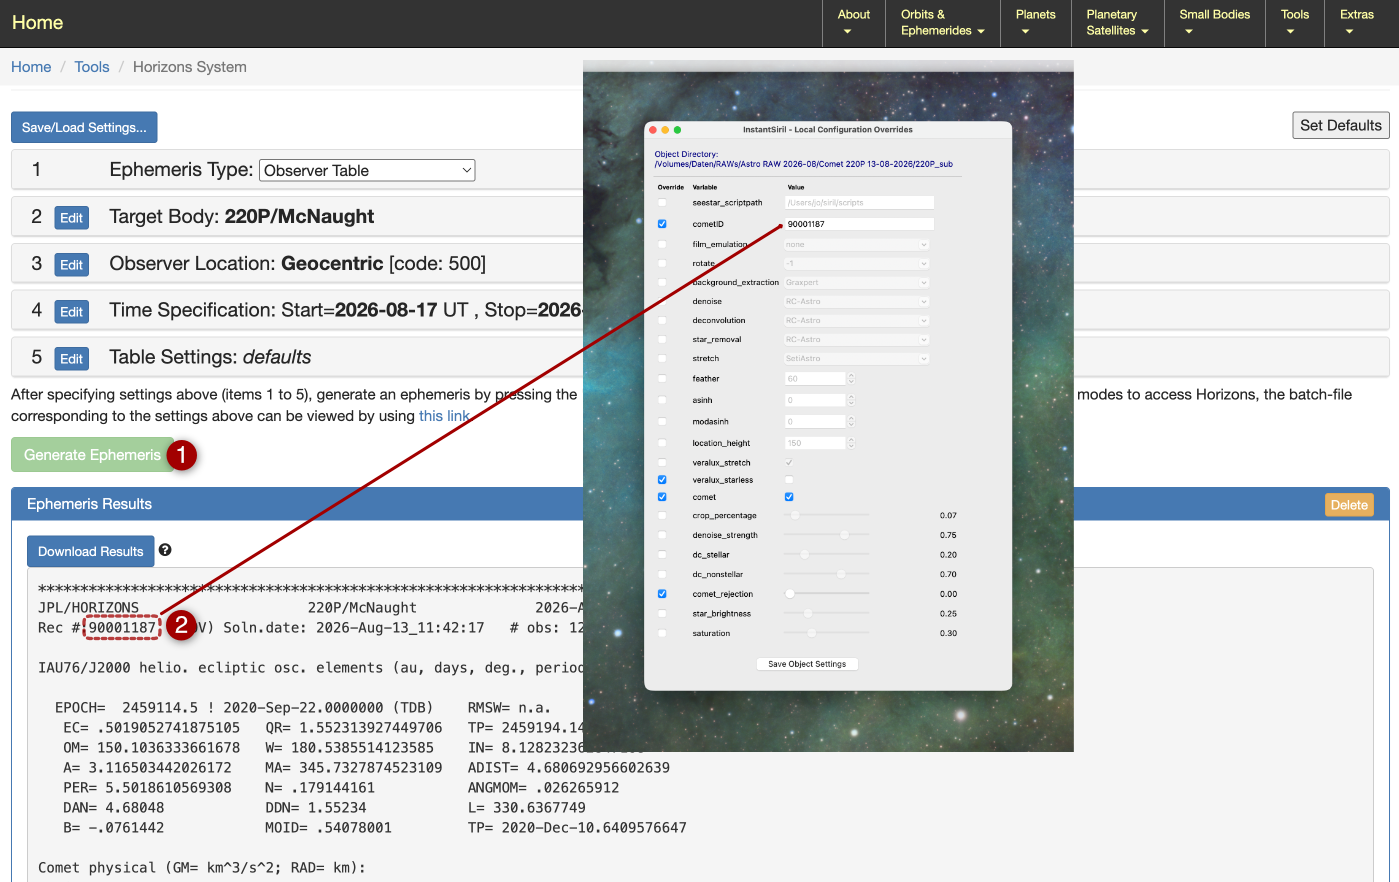
When processing comets, InstantSiril does not perform the following functions, even if they are specified in the settings: Deconvolution, Film Emulation, Crop, processing of LP filter exposures.
The result then looks, for example, like this (file output "instantsiril_comet.fit" in linear format, i.e., to be stretched using VeraLux Hypermetric Stretch):
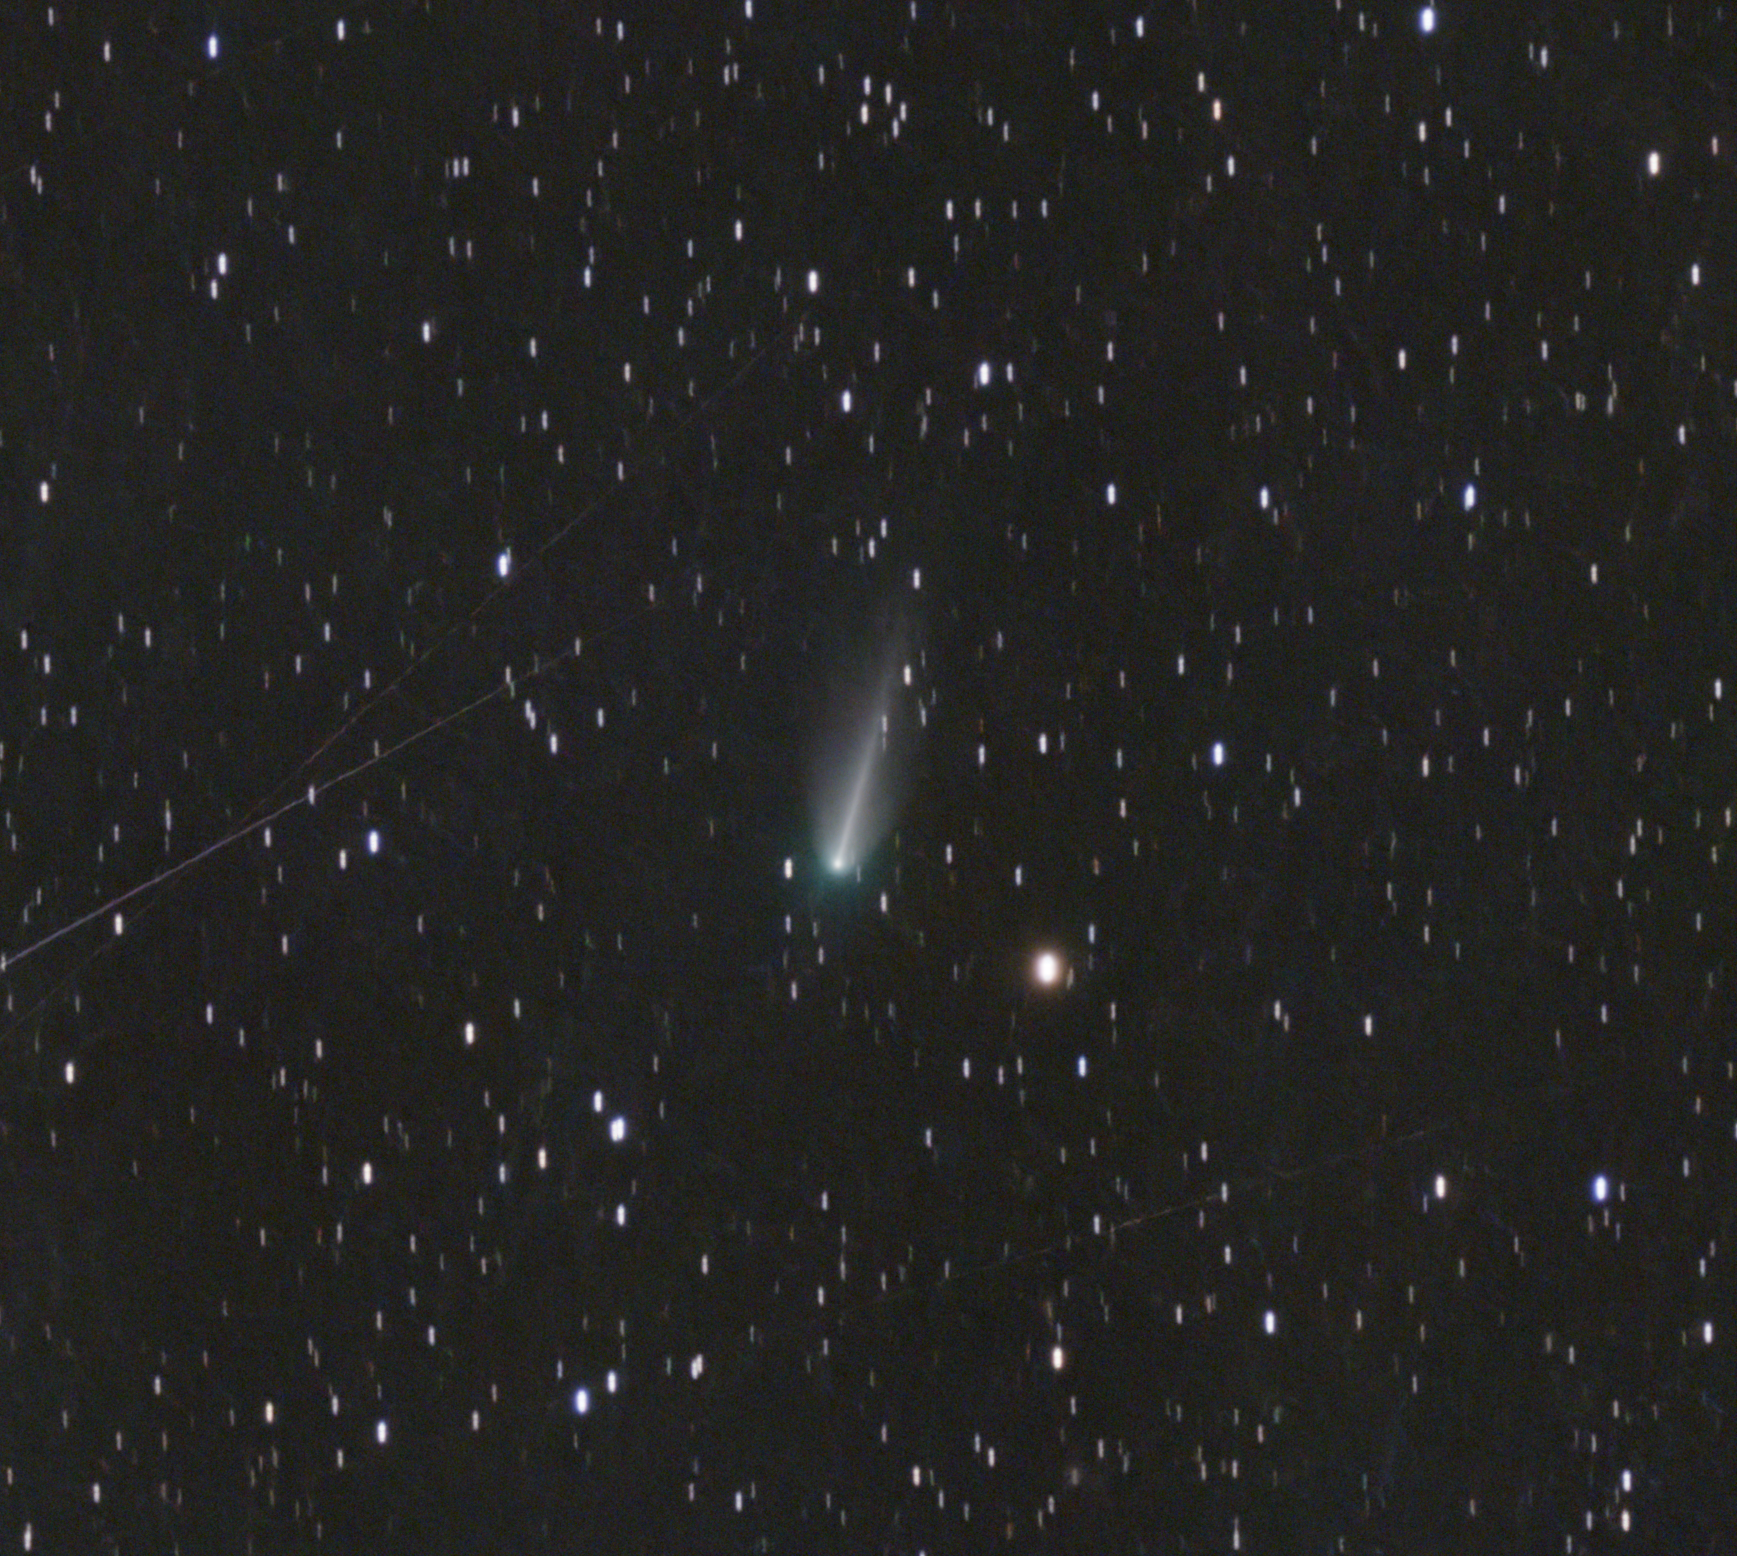
The stars can be seen as streaks, since the image is focused on the comet. Satellite trails are also visible in the image. These can be reduced by increasing the "comet_rejection" parameter, although this may have an effect on the star trails. InstantSiril also generates file outputs for normal deep-sky processing, such as "instantsiril_linear.fit". We can ignore these here, since they do have sharp stars, but the comet is out of focus and shows artifacts.
If you enable veraLux_starless in the settings, InstantSiril generates a starless version of the comet, just as it does for deep-sky images. Warning: Due to the computational effort involved, this operation can take a very long time! You can extract the stars from the standard output and overlay them onto the starless version of the comet, thus obtaining a sharp comet with sharp stars. The comet and the stars do not match exactly in terms of image crop and position, and must be aligned in a graphics program.
Note: The comet function is still in early beta testing and may therefore still contain some errors.
Manual Image Cropping (from v1.4)
In some cases, e.g. with mosaics, automatic image cropping is problematic and not always reliable. From version 1.4 onwards, you can perform a manual crop. To do this, delete the stacked file from the source images: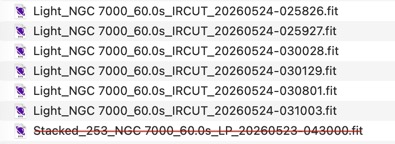
InstantSiril then performs a quick processing run, and you can manually crop the result:
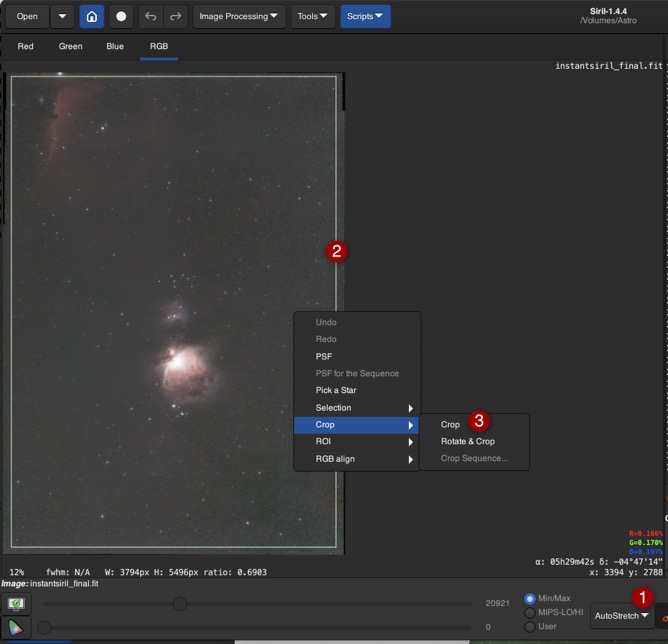
Via a script call, this result is then saved in the source files directory under the name "instantsiril_crop_reference.fit":
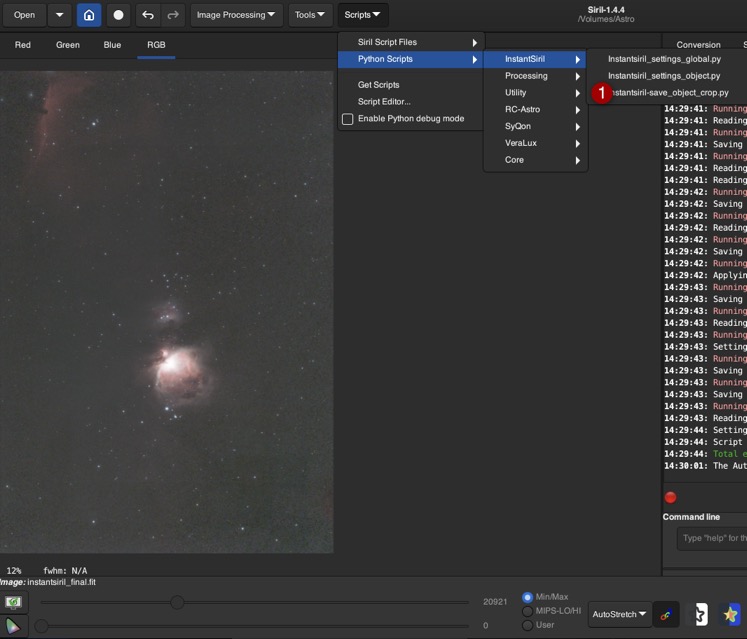
When reprocessing the image data, the result will now be cropped to exactly match this selection.
Sample images, created with InstantSiril / Affinity Photo
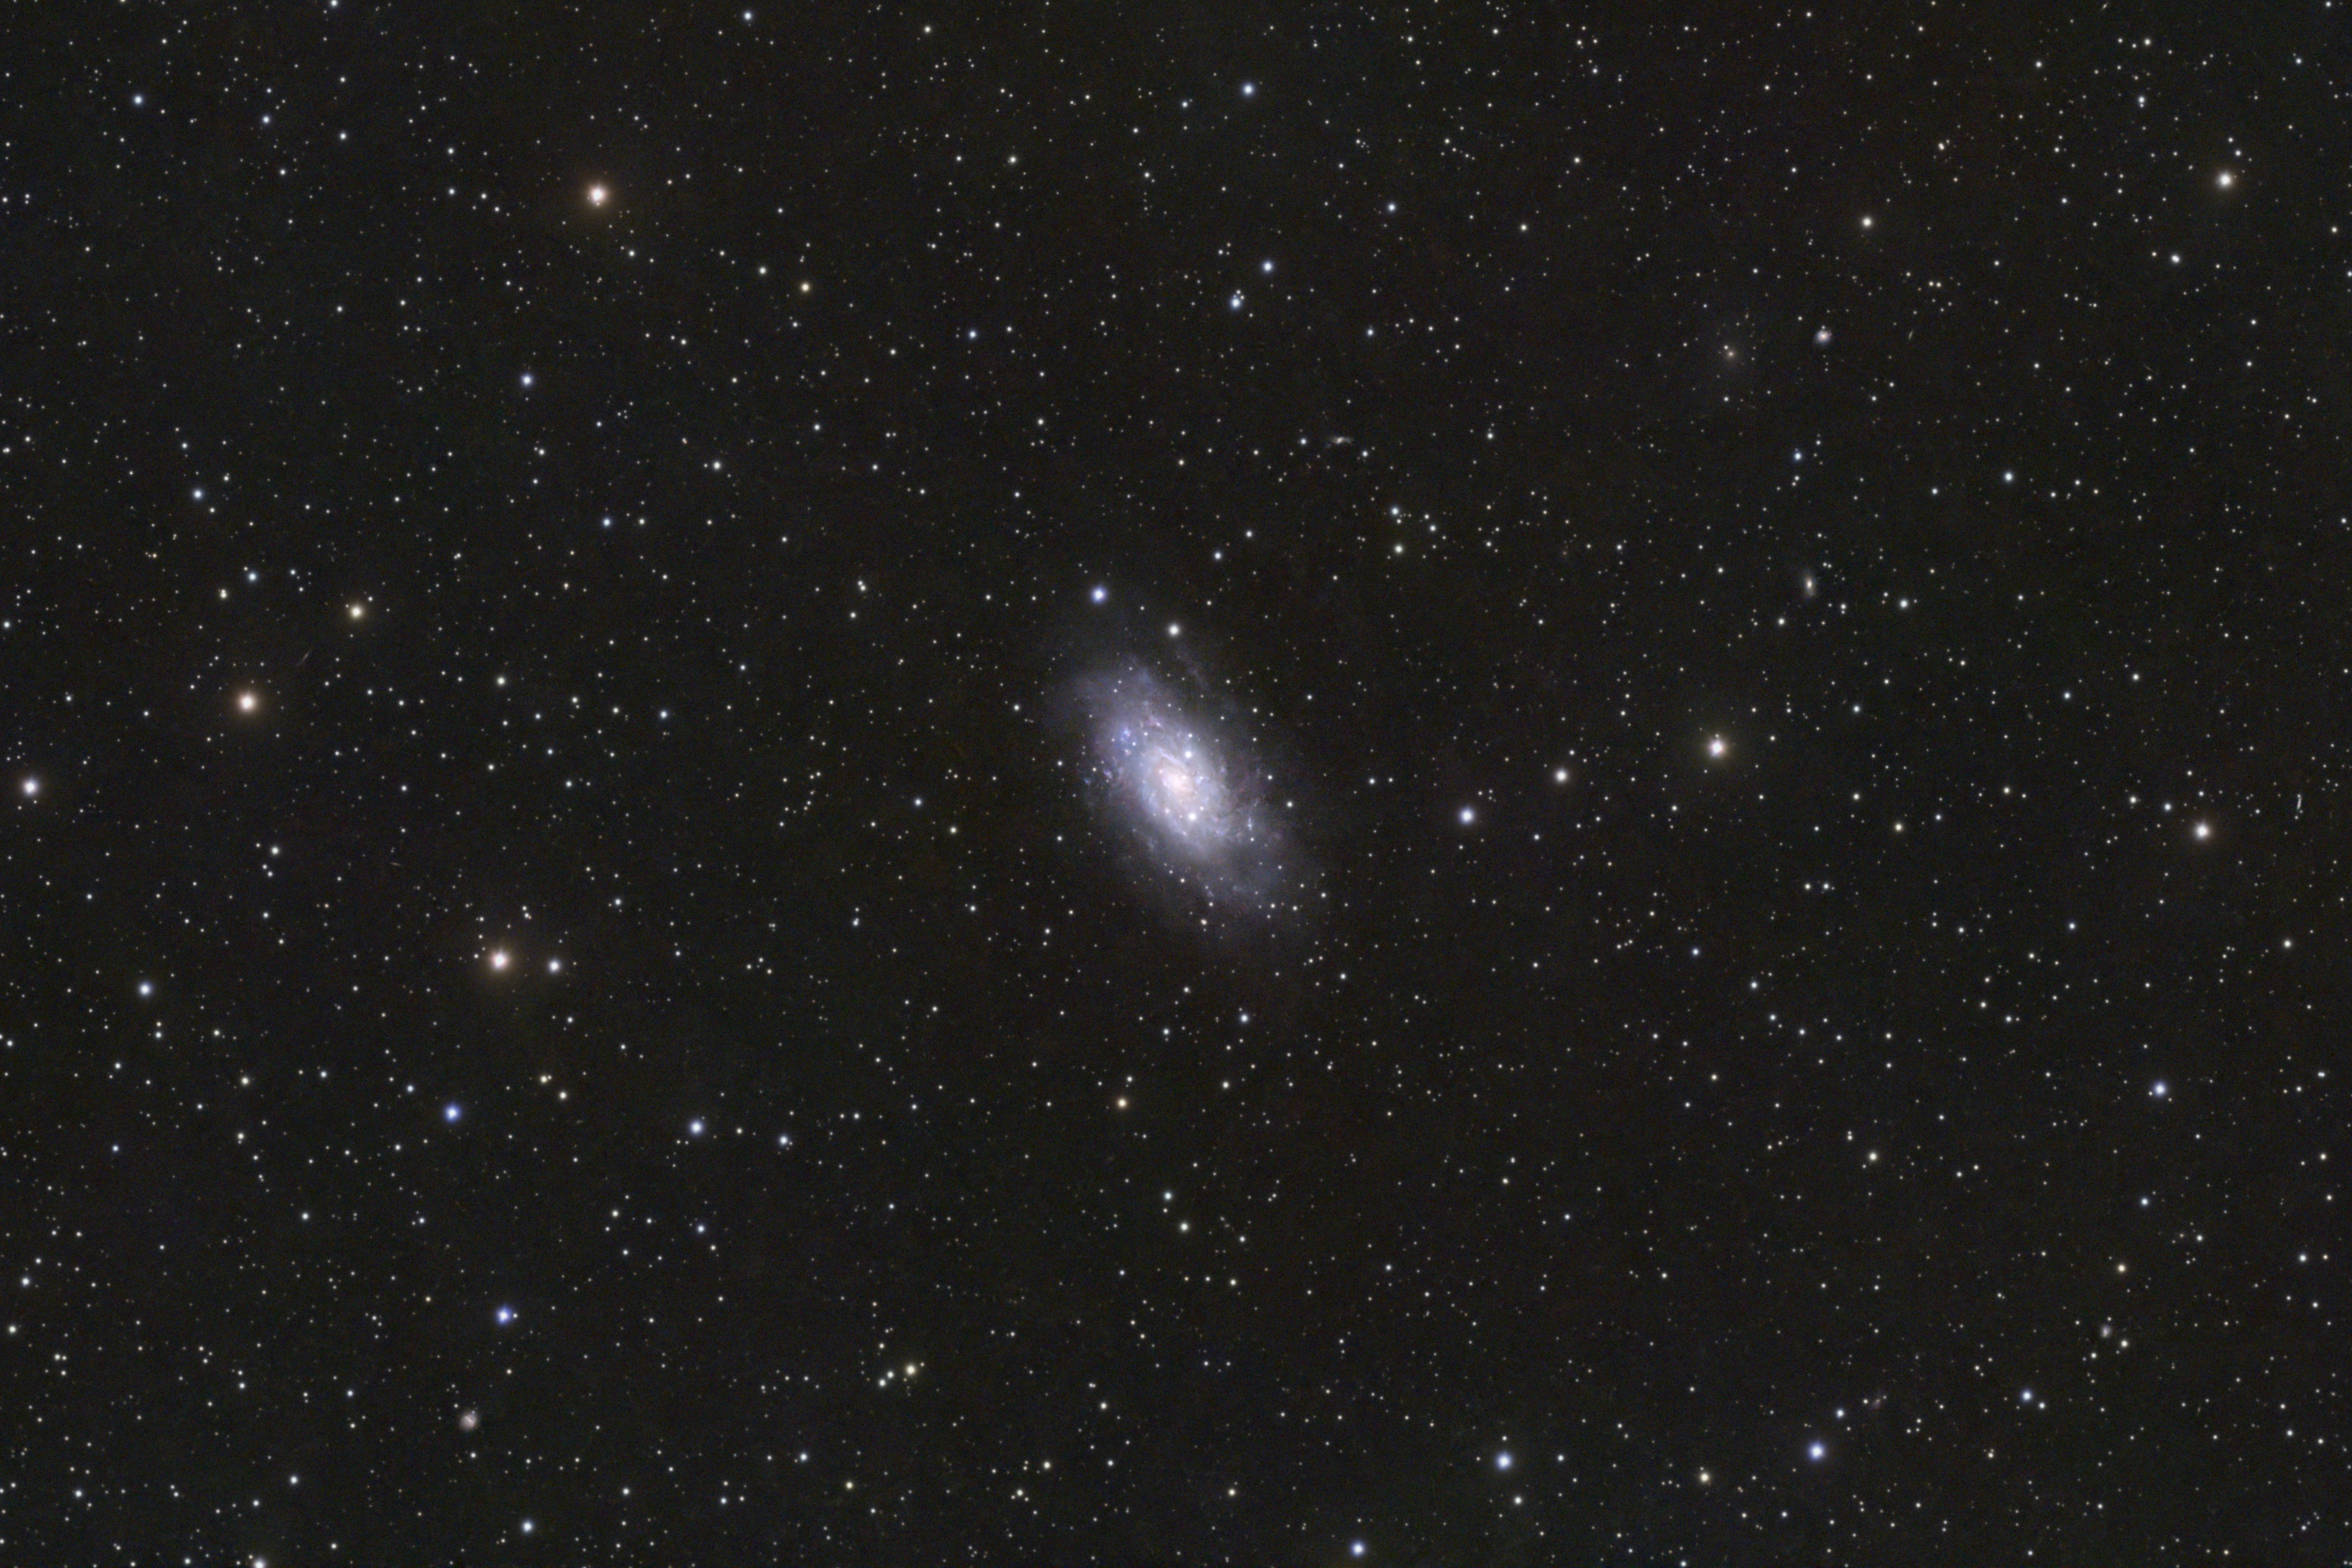
NGC 2403 | 29.04.2026 | Seestar S30 Pro | 822x60s RGB (13.70 h)
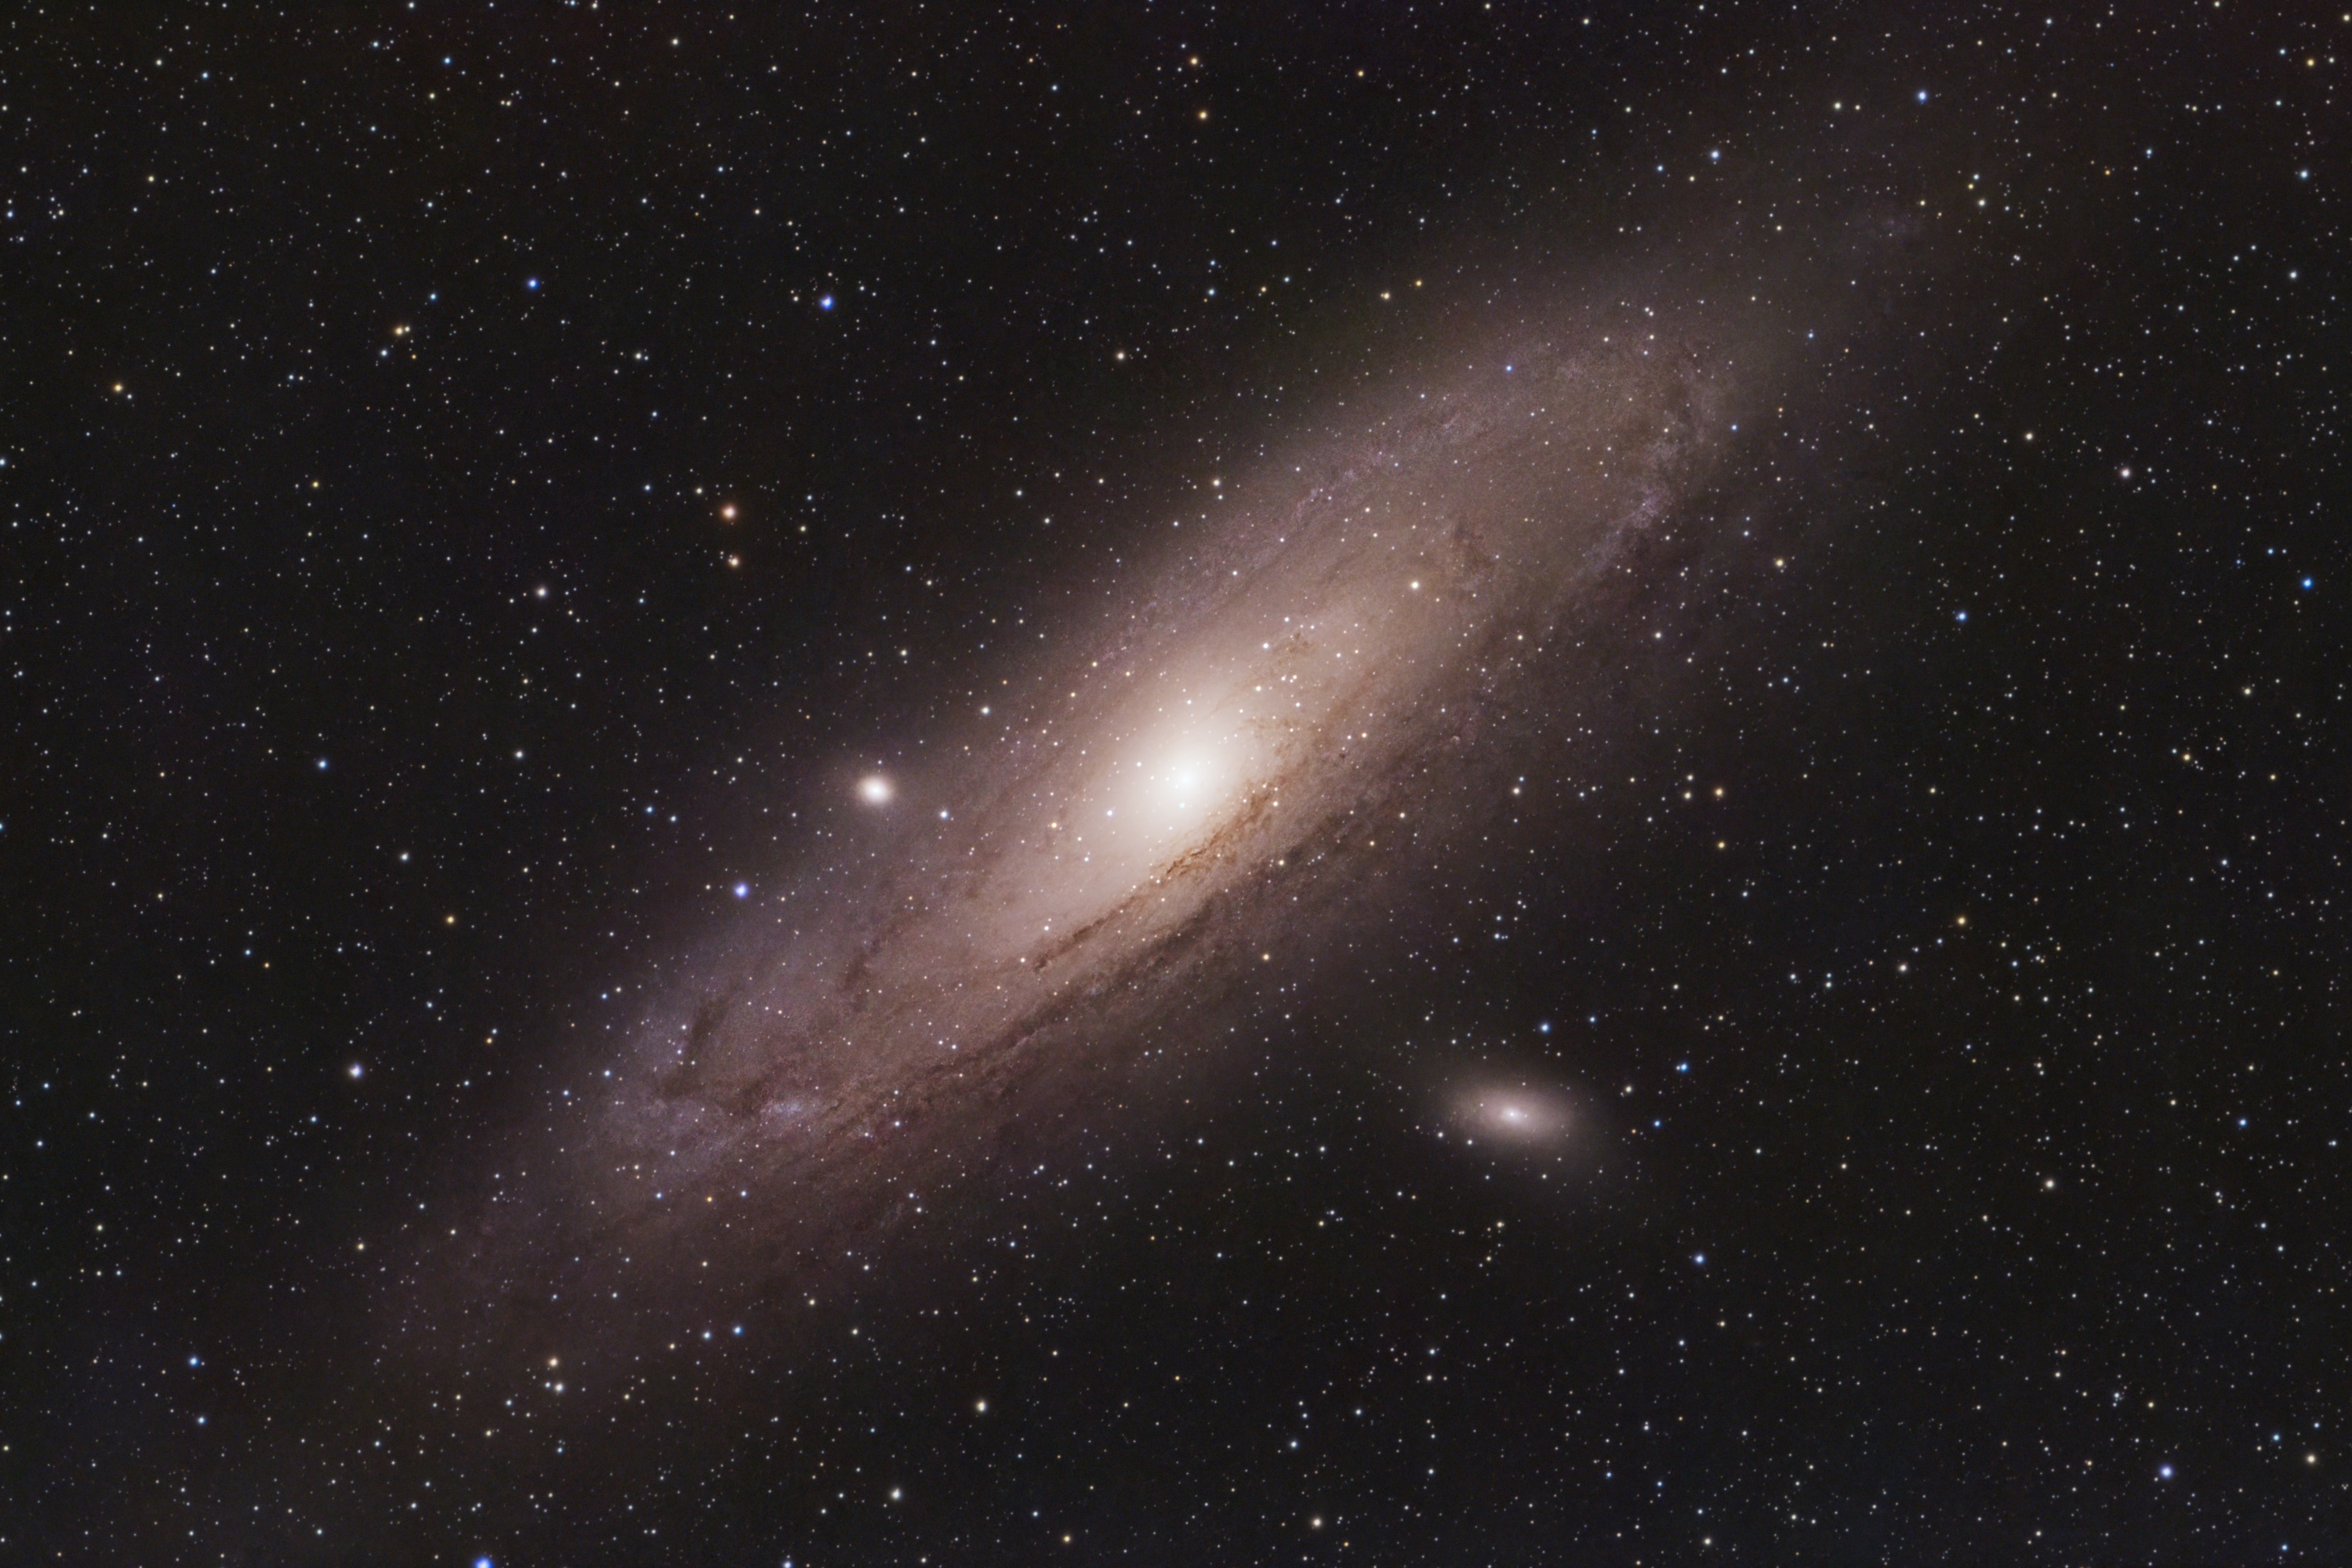
M 31 | 16.07.2026 | Seestar S30 Pro | 213x60s RGB (3.55 h)
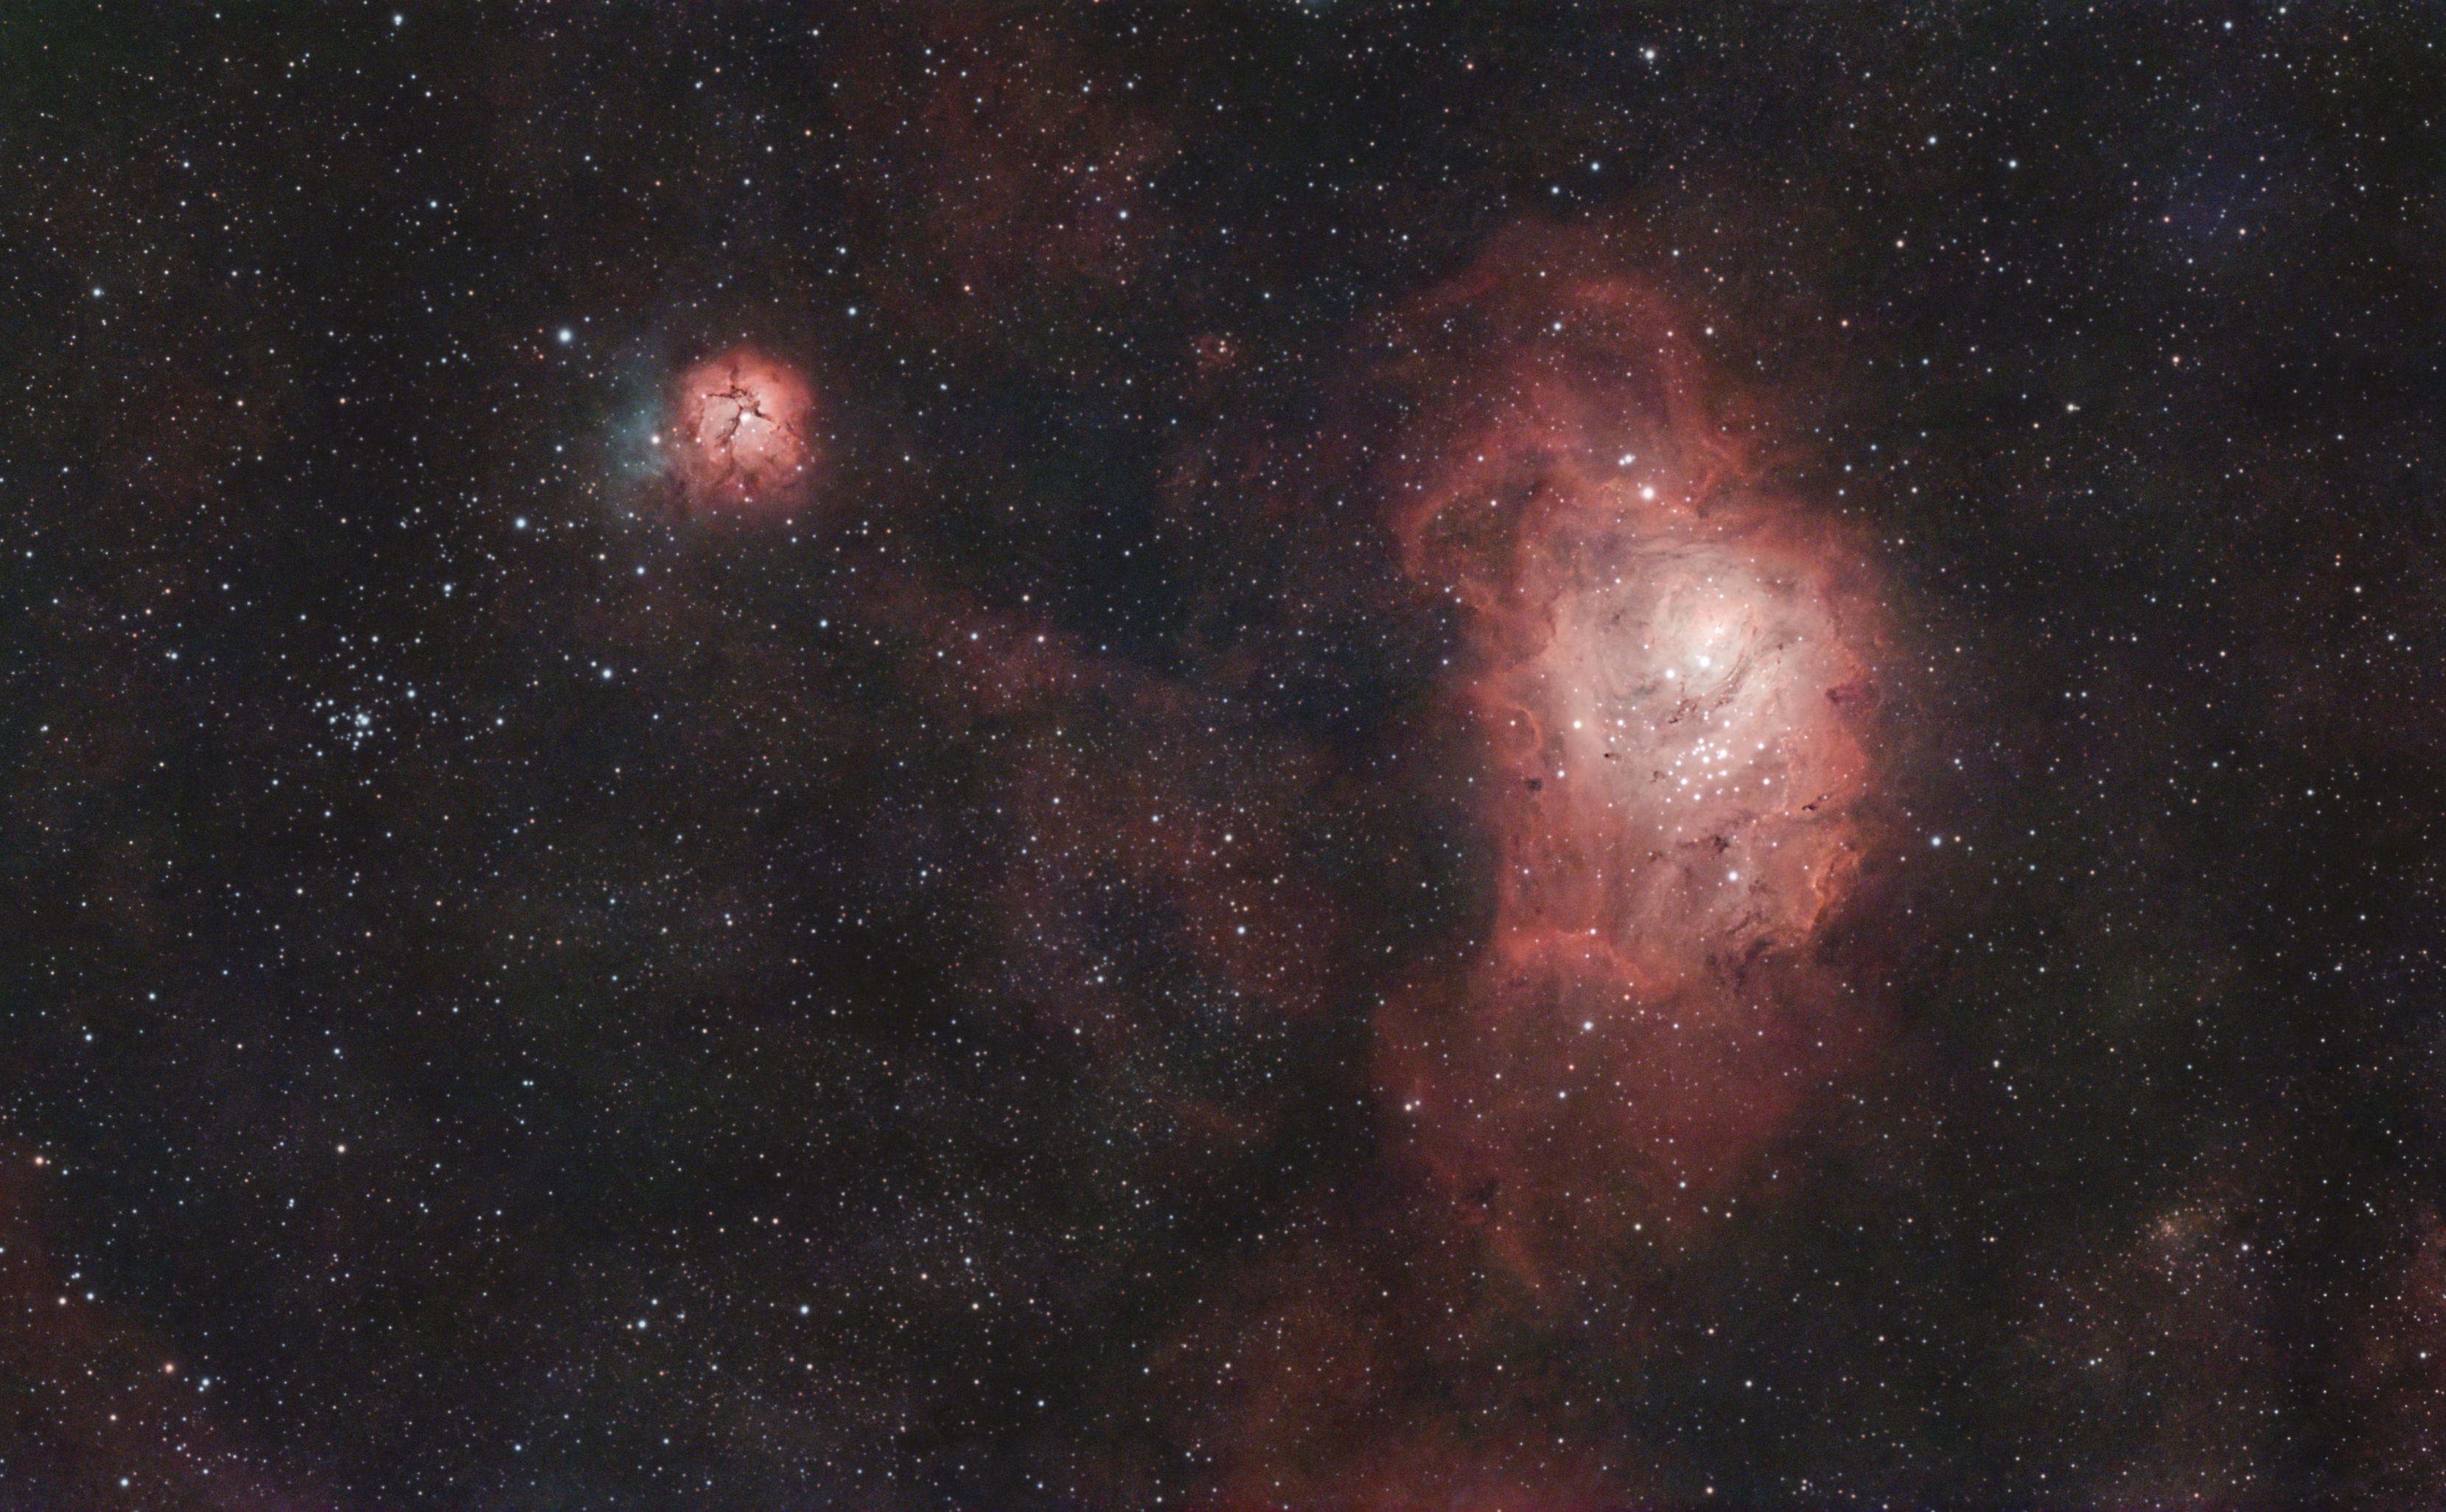
M 8 und M 20 | 09.08.2026 | Seestar S30 Pro | 108x60s DN (1.80 h)
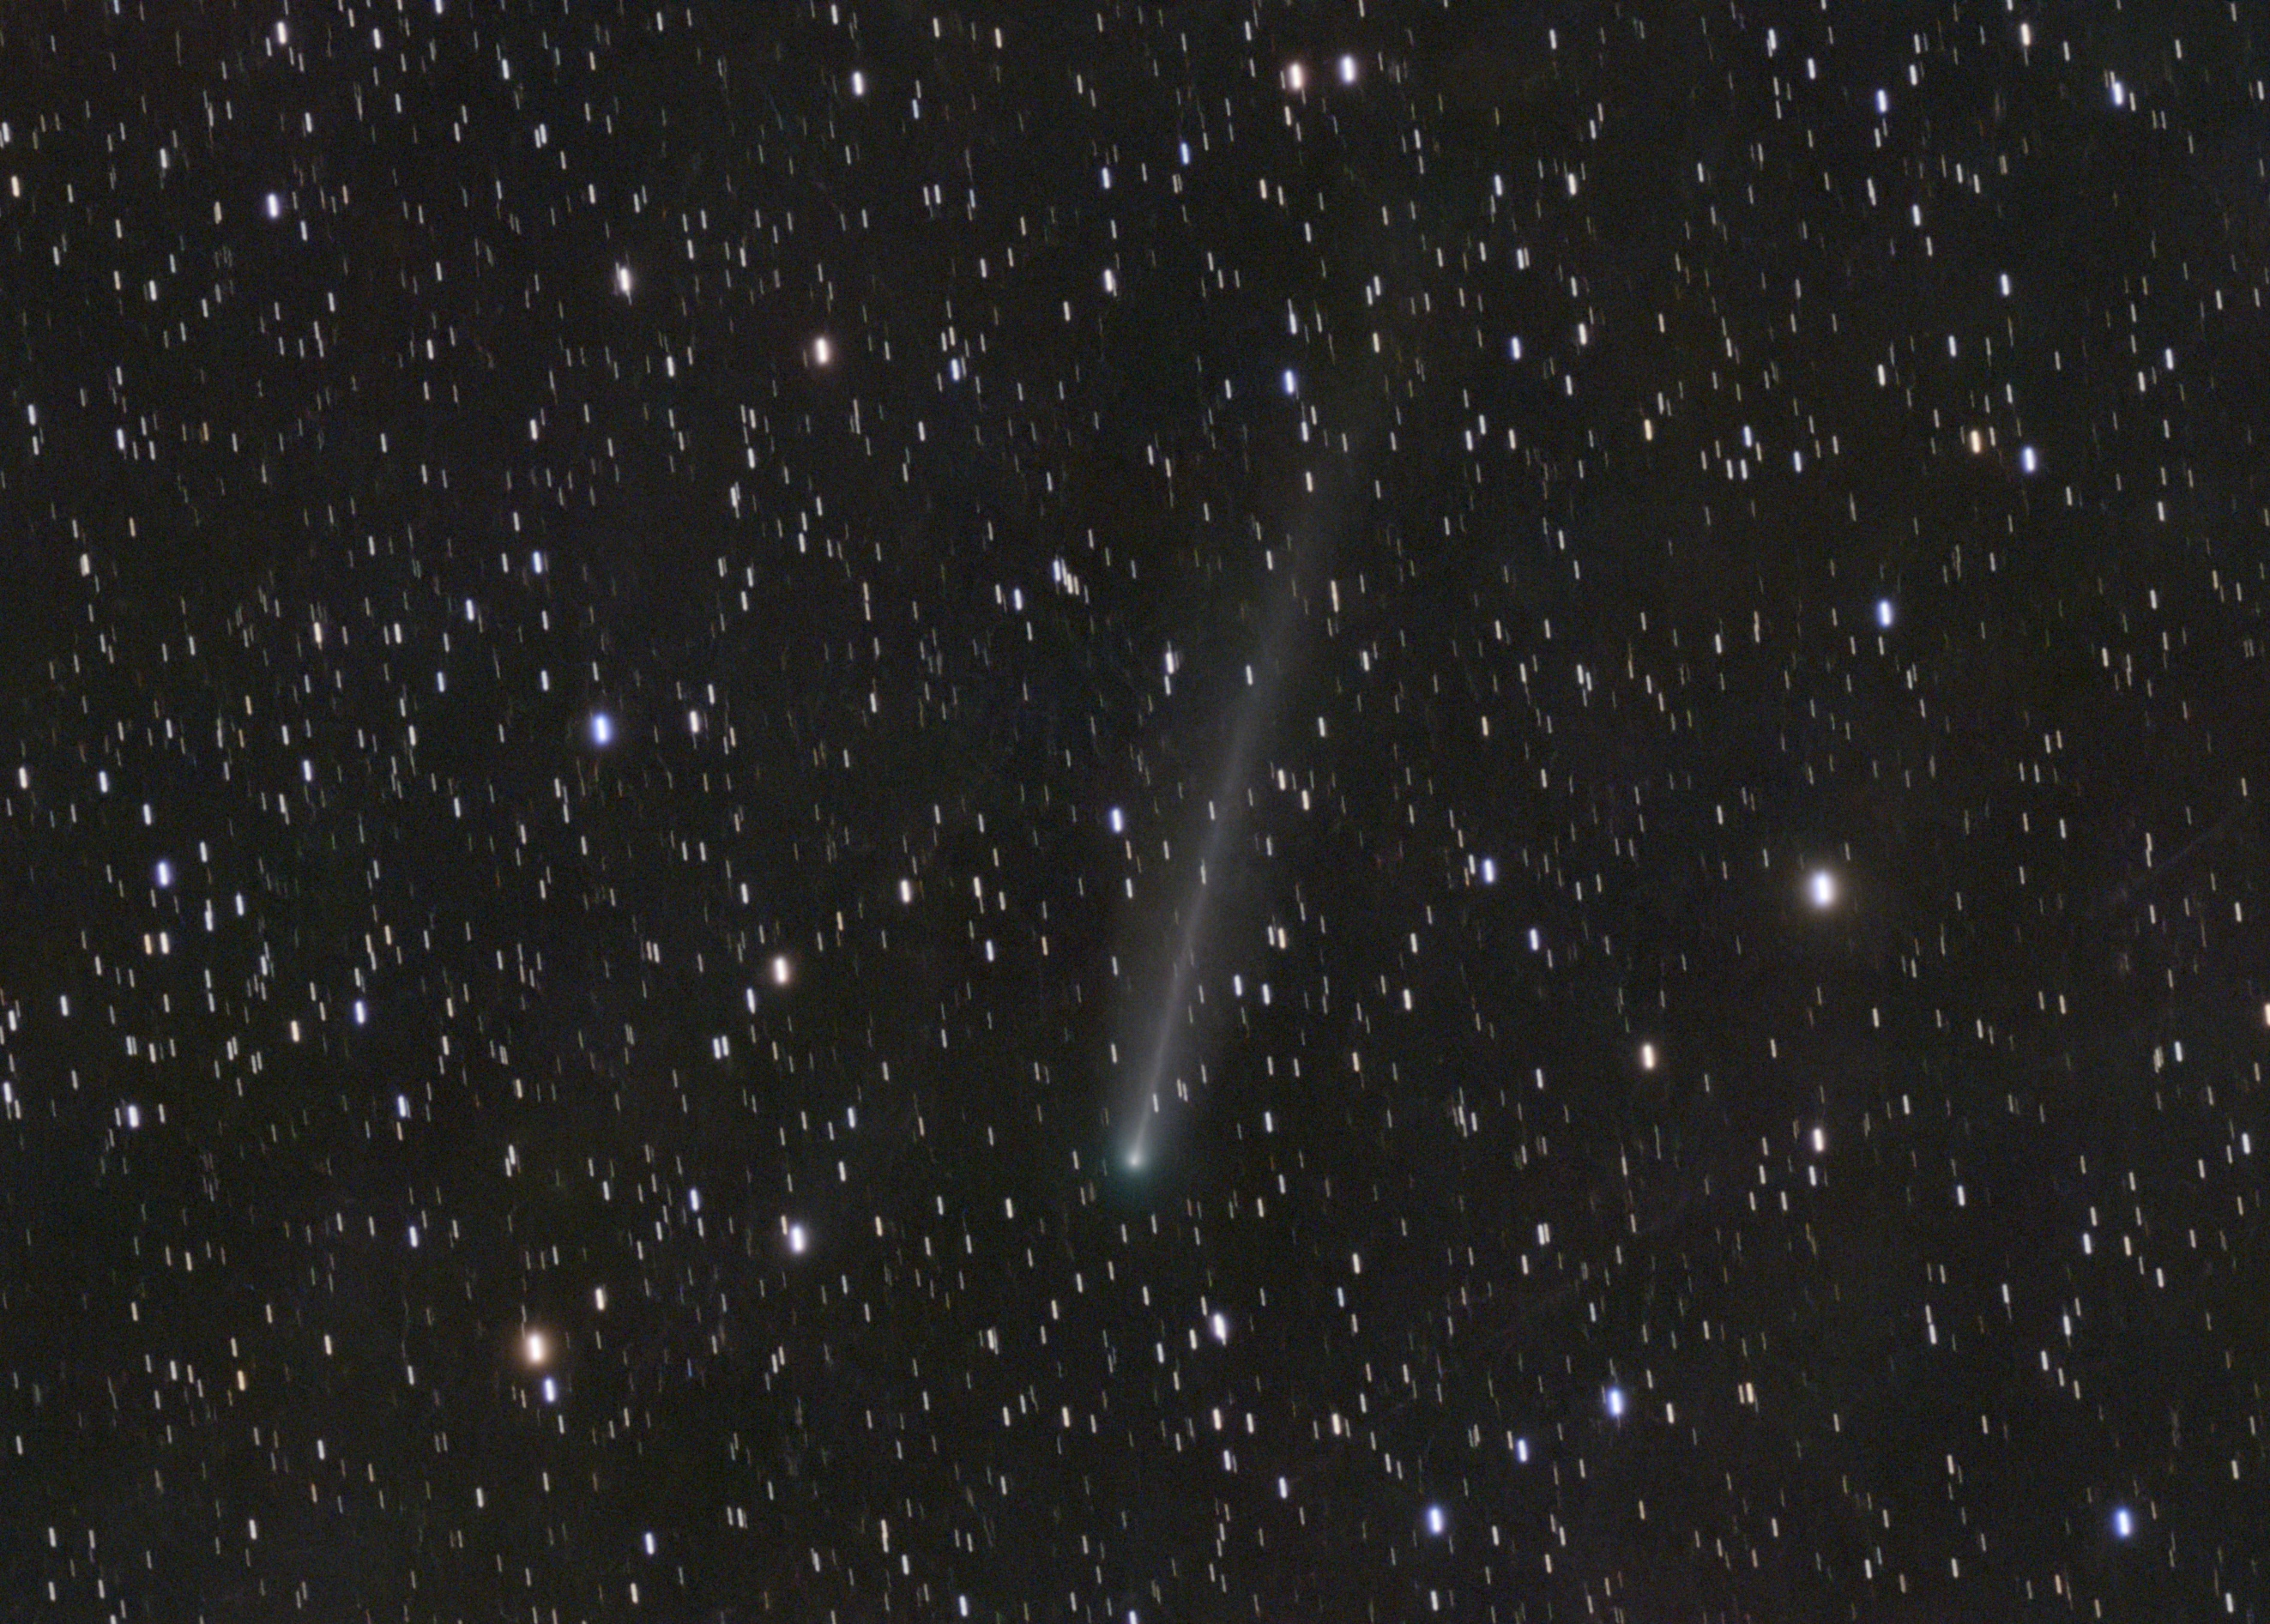
220P/McNaught | 25.08.2026 | ZWO Seestar S30 Pro | 79x60s RGB (1.32 h)
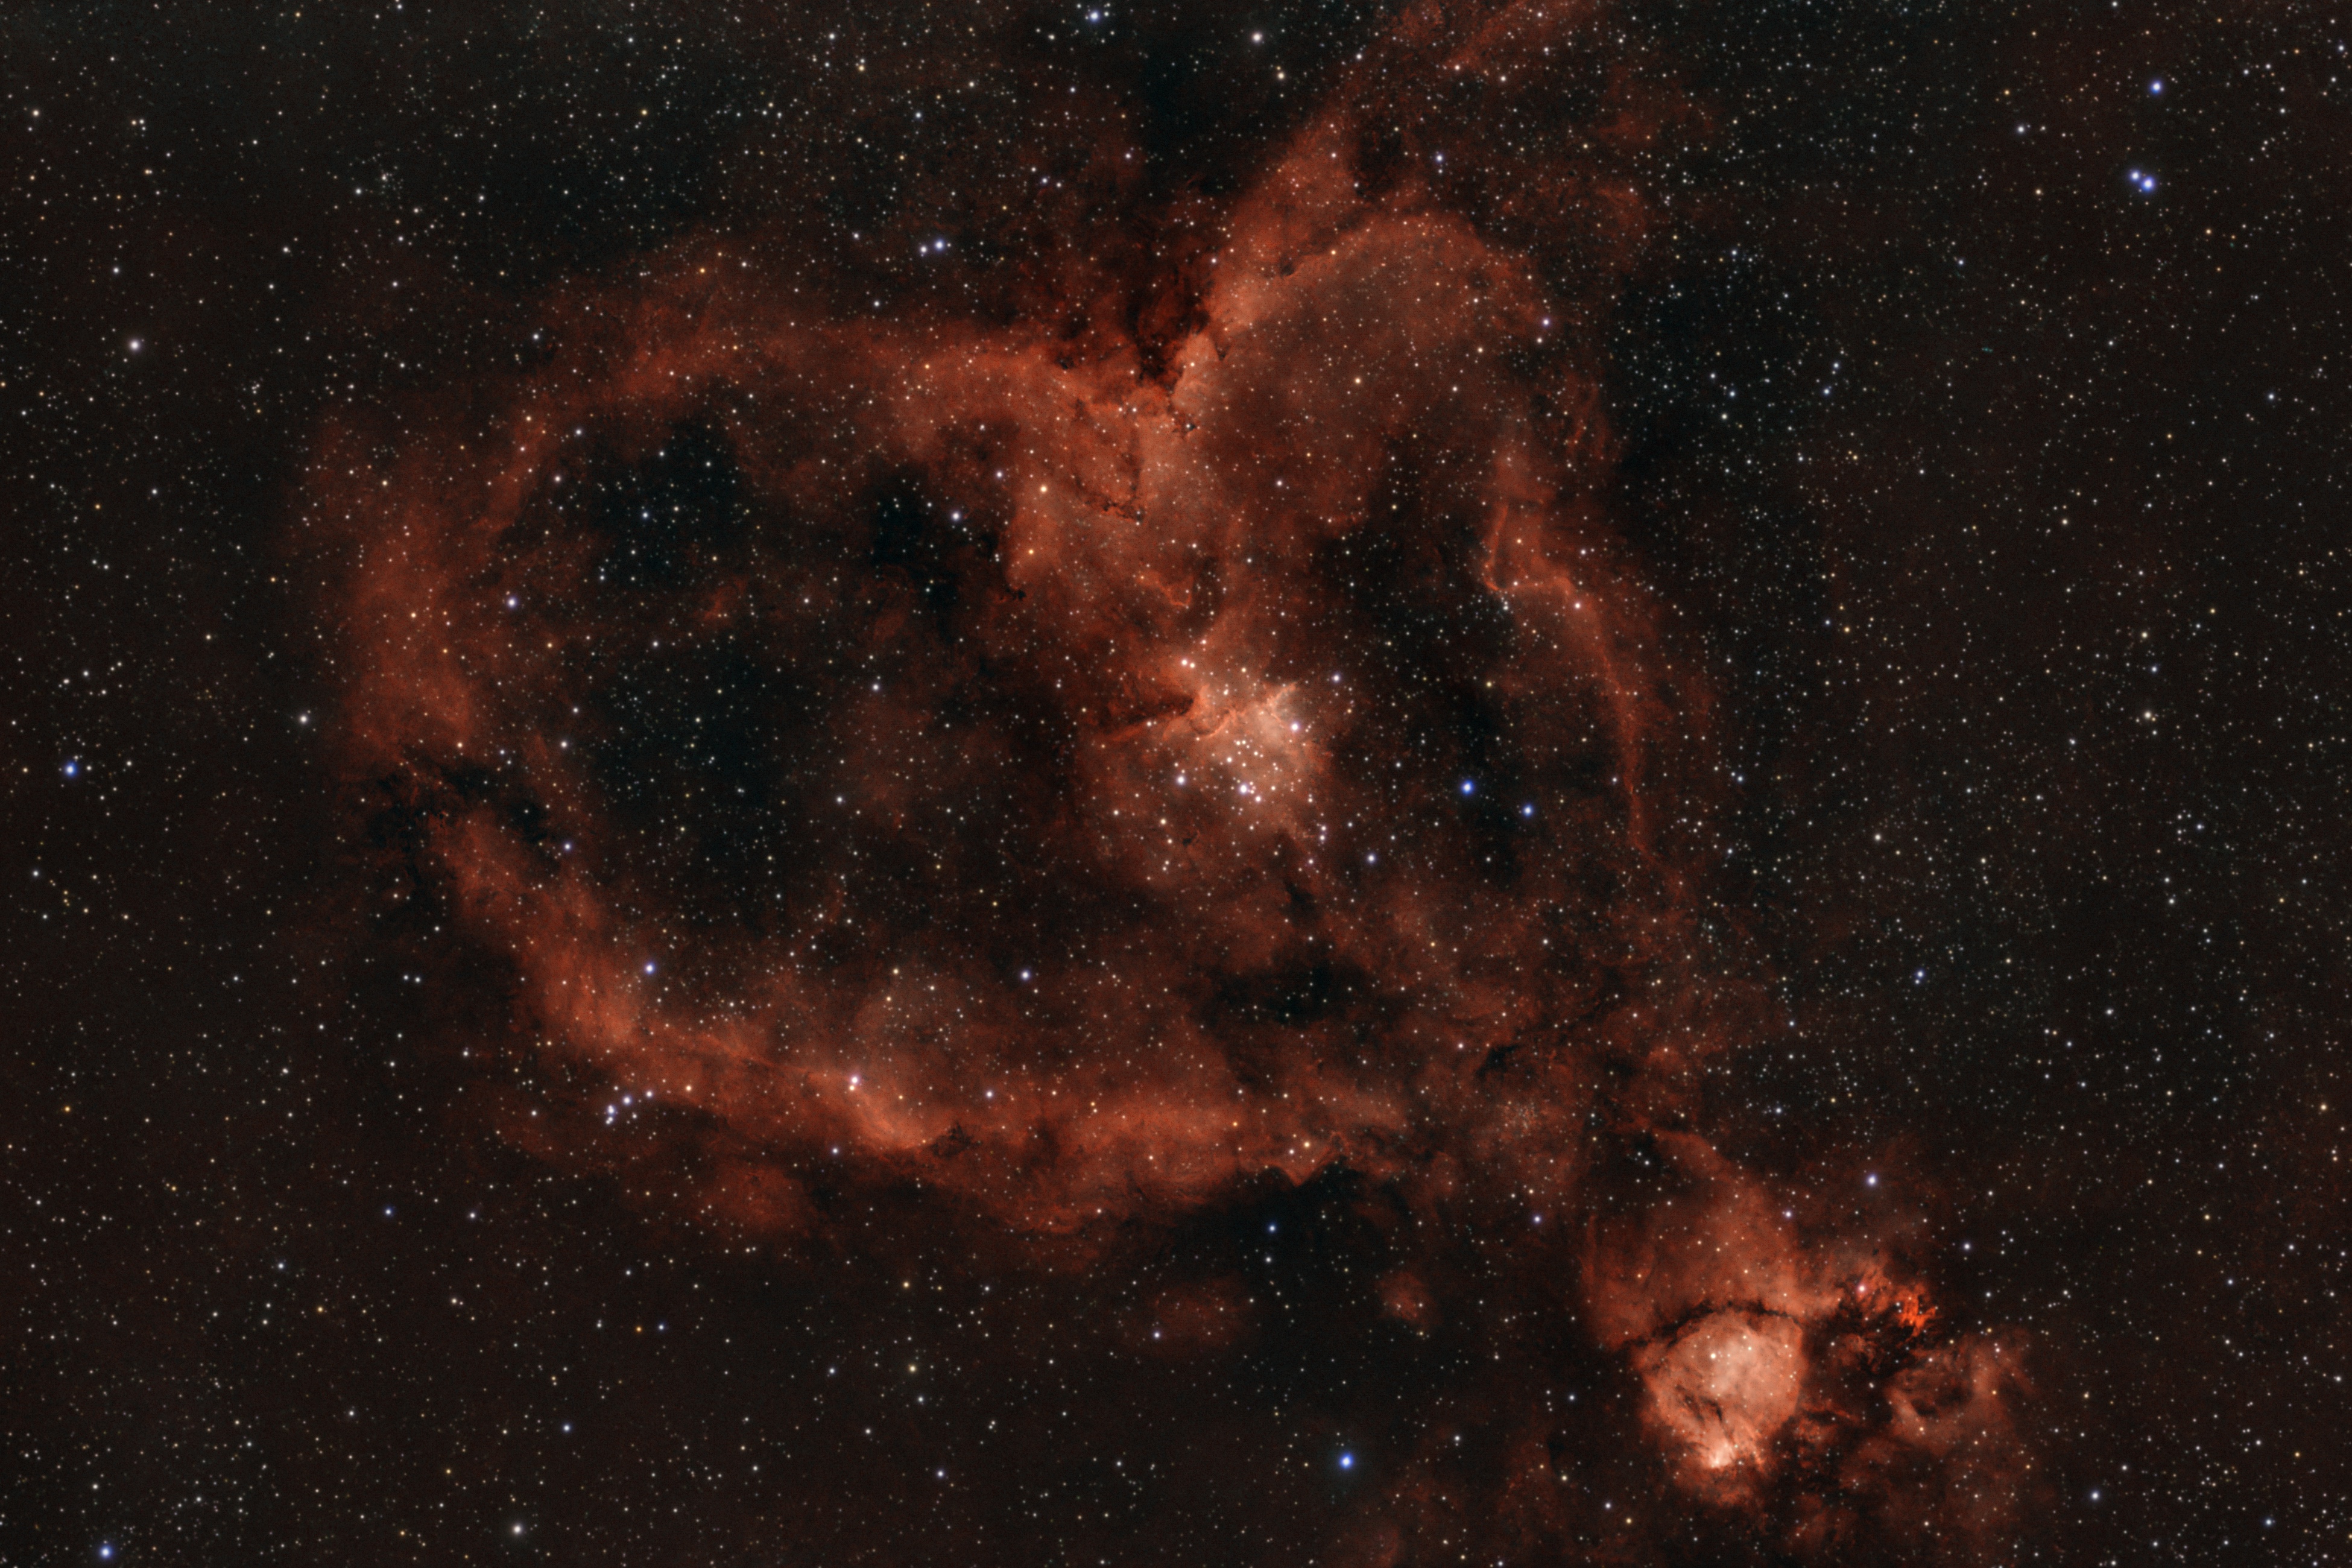
IC 1805 | 25.08.2026 | ZWO Seestar S30 Pro | 35x60s RGB + 524x60s DN (9.32 h)
>>> Miscellaneous Notes
>>> Back to the Table of Contents